Semgrep is a powerful static analysis tool for catching security vulnerabilities and code quality issues. But after scanning, teams often struggle with organizing, assigning, and tracking those findings, especially across large or fast-moving projects.
That’s where DefectDojo comes in. It provides a structured way to manage Semgrep findings across time, modules, and teams, all from a central dashboard.
Prerequisites
Before you begin, make sure you’ve set up the following:
- Run Semgrep and Export JSON
Use the following command to scan your codebase and export results in JSON format:
semgrep scan \
  --config=p/default \
  --exclude=out \
  --exclude=.repo \
  --exclude=prebuilts \
  --exclude=external \
  --exclude=tools \
  --metrics=off \
--json > semgrep-report.json- Organize Findings in DefectDojo
DefectDojo structures findings with a clear hierarchy:
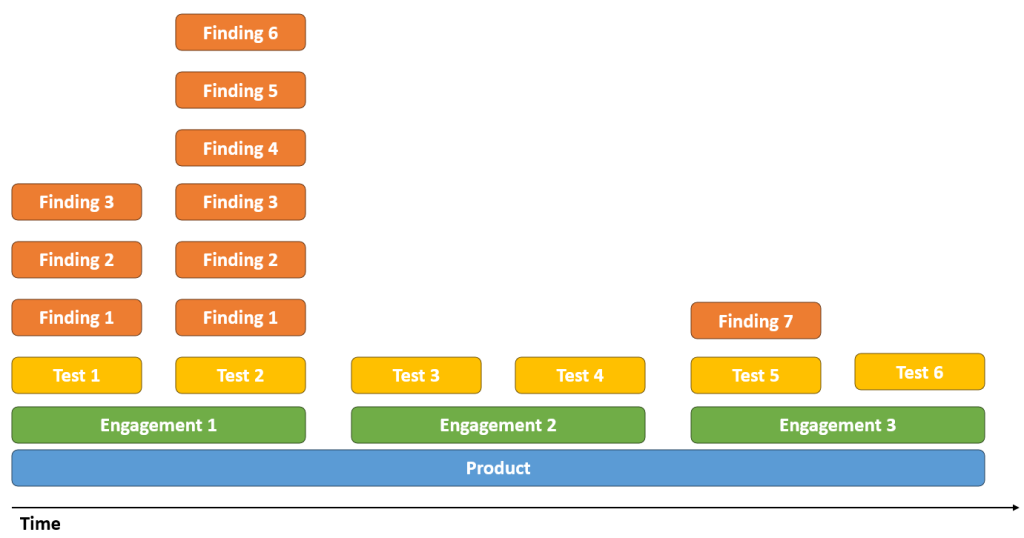
| Level | Purpose | Example |
|---|---|---|
| Product | App, system, or codebase | Mobile App |
| Engagement | Release or scan campaign | Weekly Scan |
| Test | Individual scan run | Semgrep – July 4, 2025 |
This model works well whether you’re scanning microservices, mobile apps, or monolithic platforms like AOSP.
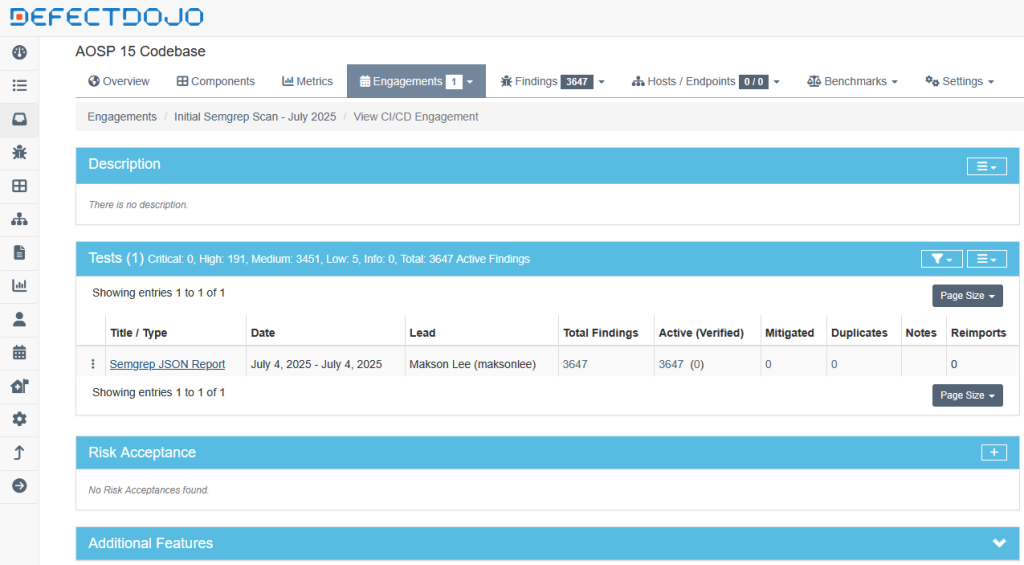
- Import the Semgrep Report
- In DefectDojo, go to your Engagement.
- Click Import Scan Results.
- Select:
- Scan Type:
Semgrep JSONReport - File:
semgrep-report.json
- Scan Type:
- Click Upload
DefectDojo will automatically create a Test and add individual findings from the report.
- Triage and Track Findings
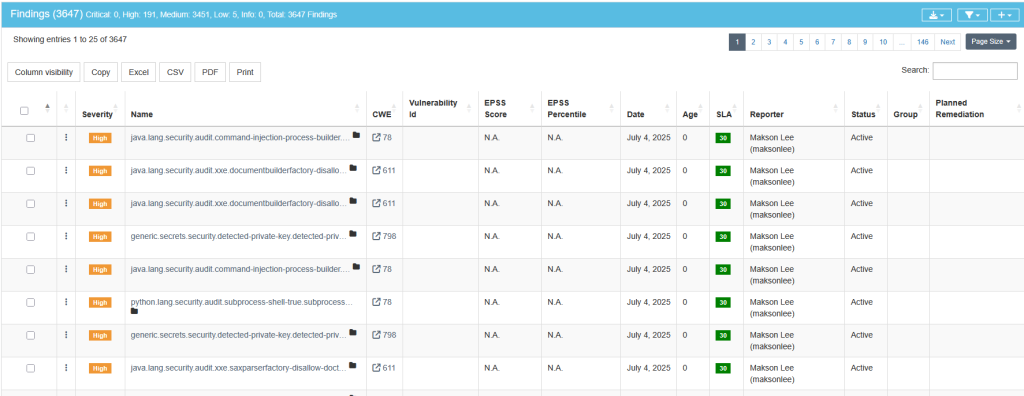
Use DefectDojo’s rich UI to:
- Filter findings by severity, rule, or path
- Assign issues to developers
- Mark findings as false positive, duplicate, or mitigated
- Add tags, comments, or JIRA tickets
You can also compare scans over time or track whether issues were reintroduced in later releases.
Did this guide save you time?
Support this site