
This post shows how to install MeshCentral on Ubuntu 26.04, run it as a systemd service, and provide its web interface directly on HTTPS port 443 without a reverse proxy.
This is an internal-only deployment. The hostname meshcentral.maksonlee.com does not need a public A or AAAA record, and no inbound Internet port is required for certificate validation. LAN clients resolve the hostname to the private server IP through internal DNS.
The HTTPS certificate is still issued by Let’s Encrypt using a Cloudflare DNS-01 challenge. Certbot temporarily publishes only the required _acme-challenge TXT record through the Cloudflare API, then deploys the issued certificate into MeshCentral’s data directory.
Lab context
- Operating system: Ubuntu 26.04 LTS
- Server hostname:
meshcentral - MeshCentral URL:
https://meshcentral.maksonlee.com - Internal server IP:
192.168.0.113 - Linux account:
administrator - Installation directory:
/opt/meshcentral - Public authoritative DNS: Cloudflare, used only for the ACME TXT record
- Internal DNS:
meshcentral.maksonlee.comresolves to192.168.0.113on the LAN - Certificate tool: Certbot with the Cloudflare DNS plugin
- Web server: MeshCentral directly, without TLS offload
This walkthrough uses the existing administrator account to match the lab server. For a production deployment, follow the MeshCentral secure installation guidance: use a dedicated non-login service account and grant only the permissions MeshCentral needs.
Internal-only design with Let’s Encrypt DNS-01
MeshCentral has built-in Let’s Encrypt support, but its documented challenge method is HTTP-01. The official SSL and Let’s Encrypt documentation says that port 80 must be open and forwarded to the MeshCentral server for that flow.
This setup uses DNS-01 because certificate validation should not depend on an inbound HTTP port. As described in the Let’s Encrypt DNS-01 documentation, validation checks a TXT record rather than connecting to the MeshCentral web server. Certbot creates the temporary record under _acme-challenge.meshcentral.maksonlee.com through the Cloudflare API.
After issuance, a deployment script copies Certbot’s leaf certificate, private key, and intermediate chain into the filenames expected by MeshCentral under meshcentral-data. The same script runs again after a successful renewal and restarts the MeshCentral service.
Do not create a public A or AAAA record for this internal-only deployment. Let’s Encrypt queries the public TXT record created for the challenge, but it never needs the hostname to resolve to the MeshCentral server. LAN clients and MeshAgents instead use internal DNS to resolve meshcentral.maksonlee.com to 192.168.0.113 and connect to TCP 443 over the private network.
1. Check the server environment
Connect to the server:
ssh administrator@meshcentral.maksonlee.comCheck the operating system, hostname, memory, and disk space:
cat /etc/os-release
hostname
uname -m
free -h
df -h /Check whether the required ports are already in use:
sudo ss -ltnp | grep -E ':(80|443|4433)\b' || trueIn this setup, ports 80, 443, and 4433 were initially unused. Port 443 is used by the MeshCentral web interface and MeshAgents. Port 4433 is only needed for Intel AMT CIRA connections.
2. Install Node.js, NPM, Certbot, and the Cloudflare plugin
sudo apt update

sudo apt install -y --no-install-recommends \
  nodejs \
  npm \
  certbot \
  python3-certbot-dns-cloudflare \
jqVerify Node.js and NPM:
node --version
npm --versionUbuntu 26.04 provides Node.js 22. The --no-install-recommends option avoids optional NPM test and development packages that are not required on a MeshCentral server.
3. Create the MeshCentral installation directory
sudo install -d \
  -o administrator \
  -g administrator \
  /opt/meshcentral

cd /opt/meshcentralThe directory is owned by administrator. This is important because the official MeshCentral quick-start instructions say not to run npm install meshcentral with sudo.
4. Install MeshCentral from NPM
cd /opt/meshcentral
npm install meshcentralDo not change into node_modules/meshcentral before starting the server. MeshCentral should be launched from the directory above node_modules so that its data, files, backups, and update behavior use the expected paths.
Check the installed package:
npm list --depth=0 meshcentral
node node_modules/meshcentral --help5. Create the MeshCentral configuration
mkdir -p /opt/meshcentral/meshcentral-data
vi /opt/meshcentral/meshcentral-data/config.jsonUse this initial configuration:
{
  "$schema": "https://raw.githubusercontent.com/Ylianst/MeshCentral/master/meshcentral-config-schema.json",
  "settings": {
    "Cert": "meshcentral.maksonlee.com",
    "Port": 443,
    "RedirPort": 0,
    "ExactPorts": true
  },
  "domains": {
    "": {
      "Title": "MeshCentral"
    }
  }
}Important settings:
Certsets the DNS name used by browsers and agents.Port: 443makes MeshCentral serve HTTPS directly.RedirPort: 0disables the HTTP redirect listener because this setup does not use port 80.ExactPorts: truemakes startup fail instead of silently moving to another port when 443 is unavailable.
Do not add MeshCentral’s built-in letsencrypt section. Certbot manages the certificate externally in this setup.
Validate the JSON:
jq empty /opt/meshcentral/meshcentral-data/config.json
echo $?Expected result:
06. Install MeshCentral as a systemd service
Run the installer as administrator from /opt/meshcentral:
cd /opt/meshcentral
node node_modules/meshcentral --installDo not place sudo before node. The MeshCentral installer uses sudo only for the systemd operations and creates the service for the current Linux user. Its Linux systemd unit also uses AmbientCapabilities=cap_net_bind_service, allowing the non-root Node.js process to bind to port 443.
The first startup generates the MeshCentral identity certificates and code-signs the bundled Windows tools. This took about 20 seconds on the lab server. If the port check below initially returns no result, follow the journal until MeshCentral HTTPS server running appears instead of assuming the service failed.
Check the service:
sudo systemctl status meshcentral --no-pager
sudo systemctl is-enabled meshcentral
sudo journalctl -u meshcentral -n 100 --no-pagerCheck the listening ports:
sudo ss -ltnp | grep -E ':(443|4433)\b'At this stage, MeshCentral uses its generated self-signed web certificate. Do not install agents until the DNS name and final certificate configuration are correct.
7. Create a Cloudflare API token
In Cloudflare, create a restricted API token for the maksonlee.com zone.
Recommended permissions:
Zone → DNS → Edit
Zone → Zone → ReadRestrict the token to the maksonlee.com zone. Do not use the Cloudflare Global API Key when a restricted token is sufficient.
8. Store the Cloudflare API token
mkdir -p /home/administrator/.secrets/certbot
vi /home/administrator/.secrets/certbot/cloudflare.iniAdd:
dns_cloudflare_api_token = YOUR_CLOUDFLARE_API_TOKENProtect the file:
chmod 600 /home/administrator/.secrets/certbot/cloudflare.ini
ls -l /home/administrator/.secrets/certbot/cloudflare.iniThe command uses the full path instead of ~ because Certbot runs through sudo.
9. Request the certificate with Cloudflare DNS-01
Replace YOUR_EMAIL_ADDRESS with the email address used for the Let’s Encrypt account. The non-interactive and terms-of-service options make the command reproducible without a first-run prompt.
sudo certbot certonly \
  --non-interactive \
  --agree-tos \
  --email YOUR_EMAIL_ADDRESS \
  --dns-cloudflare \
  --dns-cloudflare-credentials /home/administrator/.secrets/certbot/cloudflare.ini \
  --dns-cloudflare-propagation-seconds 60 \
-d meshcentral.maksonlee.comIf successful, Certbot creates:
/etc/letsencrypt/live/meshcentral.maksonlee.com/cert.pem
/etc/letsencrypt/live/meshcentral.maksonlee.com/chain.pem
/etc/letsencrypt/live/meshcentral.maksonlee.com/fullchain.pem
/etc/letsencrypt/live/meshcentral.maksonlee.com/privkey.pemCheck the certificate:
sudo certbot certificates

sudo openssl x509 \
  -in /etc/letsencrypt/live/meshcentral.maksonlee.com/cert.pem \
-noout -subject -issuer -dates10. Create the MeshCentral certificate deployment script
The MeshCentral server certificate documentation supports replacing these files in meshcentral-data:
webserver-cert-public.crtwebserver-cert-private.keywebserver-cert-chain1.crt
Create the deployment script:
sudo vi /usr/local/sbin/deploy-meshcentral-certAdd:
#!/bin/sh
set -eu

EXPECTED_LINEAGE="/etc/letsencrypt/live/meshcentral.maksonlee.com"
DATA_DIR="/opt/meshcentral/meshcentral-data"

if [ -n "${RENEWED_LINEAGE:-}" ] && \
   [ "$RENEWED_LINEAGE" != "$EXPECTED_LINEAGE" ]; then
  exit 0
fi

LINEAGE="${RENEWED_LINEAGE:-$EXPECTED_LINEAGE}"

install -o administrator -g administrator -m 0644 \
  "$LINEAGE/cert.pem" \
  "$DATA_DIR/webserver-cert-public.crt"

install -o administrator -g administrator -m 0600 \
  "$LINEAGE/privkey.pem" \
  "$DATA_DIR/webserver-cert-private.key"

install -o administrator -g administrator -m 0644 \
  "$LINEAGE/chain.pem" \
  "$DATA_DIR/webserver-cert-chain1.crt"

systemctl restart meshcentral.serviceMake it executable:
sudo chmod 700 /usr/local/sbin/deploy-meshcentral-certDeploy the certificate for the first time:
sudo /usr/local/sbin/deploy-meshcentral-certThe script keeps the private key readable only by administrator, which is the account used by the MeshCentral systemd service. It does not replace MeshCentral’s root or agent certificates.
11. Add the Certbot renewal deployment hook
sudo mkdir -p /etc/letsencrypt/renewal-hooks/deploy

sudo ln -sf \
  /usr/local/sbin/deploy-meshcentral-cert \
/etc/letsencrypt/renewal-hooks/deploy/meshcentralTest renewal:
sudo certbot renew --dry-runCheck Certbot’s systemd timer:
systemctl list-timers certbot.timer
systemctl status certbot.timer --no-pagerAfter a successful renewal, the deployment hook copies the new files and restarts MeshCentral. certbot renew --dry-run does not run deploy hooks by default. Add --run-deploy-hooks when the hook itself also needs to be tested.
12. Create the first MeshCentral administrator account
Open:
https://meshcentral.maksonlee.com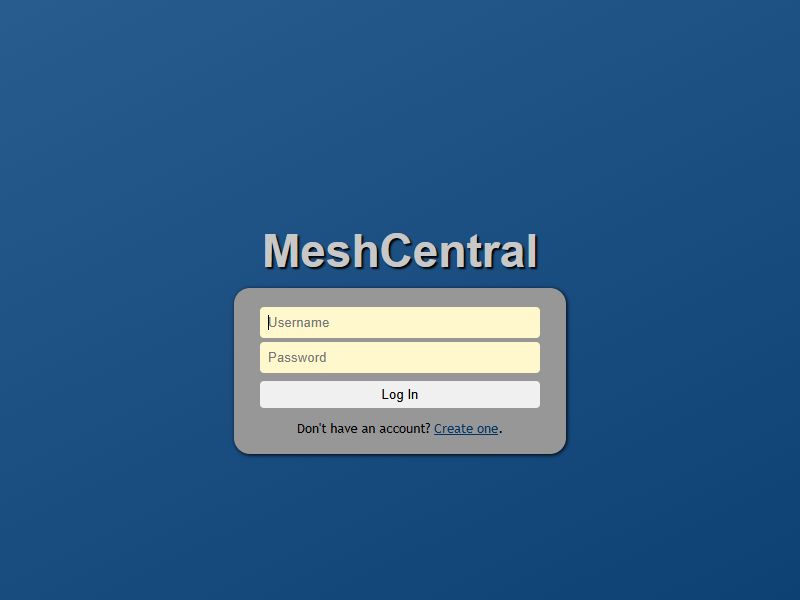
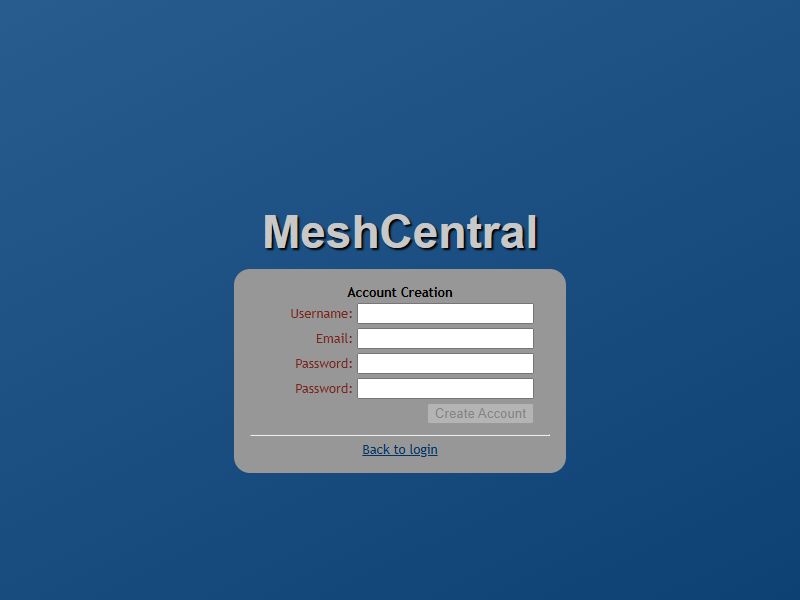
After confirming that the administrator account works, disable new account registration unless additional users should be able to register themselves.
Edit:
vi /opt/meshcentral/meshcentral-data/config.jsonChange the default domain section to:
"domains": {
  "": {
    "Title": "MeshCentral",
    "NewAccounts": false
  }
}Validate and restart:
jq empty /opt/meshcentral/meshcentral-data/config.json
sudo systemctl restart meshcentralRestarting MeshCentral ends the active browser session. Sign in again with the administrator account. With NewAccounts set to false, the Create one link is hidden on the logged-out page.
A new installation opens on the My Devices page. There are no device groups until the first one is created.
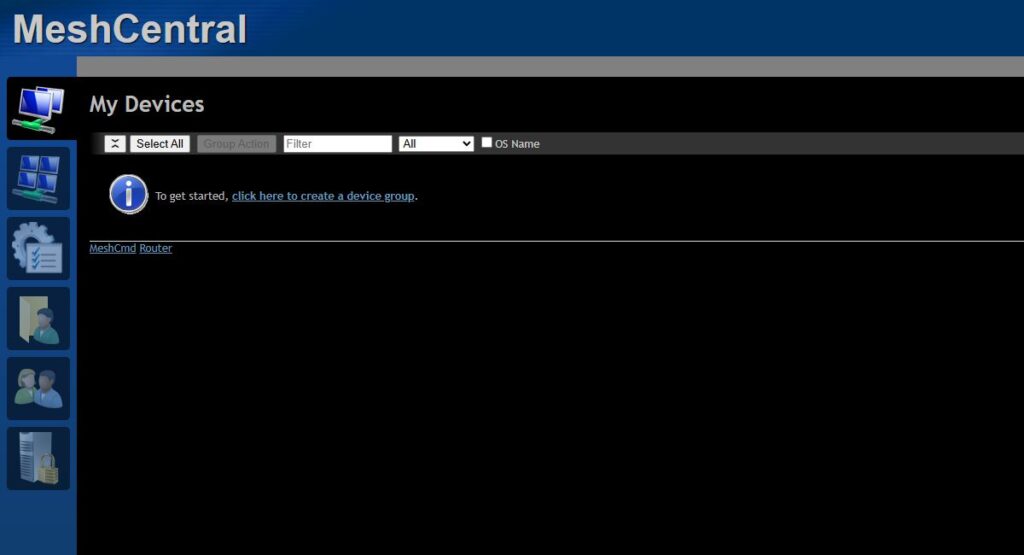
13. Invite Windows devices
Create or open a device group, such as Internal Devices, and select Invite.
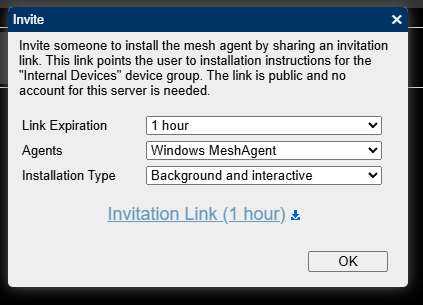
- Set Agents to Windows MeshAgent and choose a suitable link expiration.
- Copy the Invitation Link.
- On each Windows computer, open the link and follow the page to download and install the Agent.
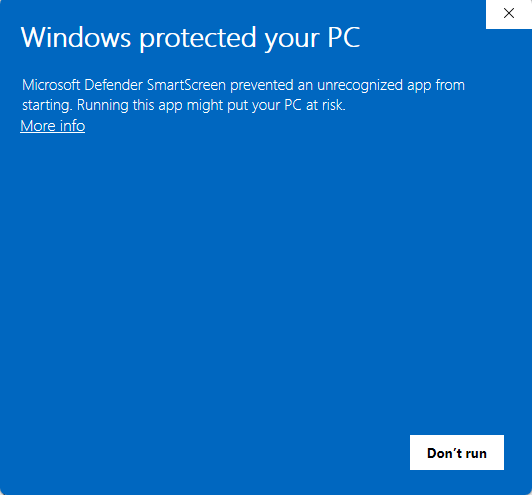
- If Microsoft Defender SmartScreen displays Windows protected your PC, select More info, confirm that the Agent came from your own invitation page, then select Run anyway.
- Return to the device group and confirm that the computer appears as Agent, Powered.
The Invitation Link does not require a MeshCentral account and can be used by multiple Windows computers until it expires.
14. Back up MeshCentral
The important directories are:
/opt/meshcentral/meshcentral-data
/opt/meshcentral/meshcentral-files
/opt/meshcentral/meshcentral-backupsmeshcentral-data contains the database, configuration, server identity certificates, and other sensitive state. Losing it means losing the original MeshCentral server identity.
Create a manual backup:
backup_file="/var/backups/meshcentral-$(date +%Y%m%d-%H%M%S).tar.gz"

sudo systemctl stop meshcentral
trap 'sudo systemctl start meshcentral' EXIT

sudo tar -C /opt/meshcentral \
  -czf "$backup_file" \
  meshcentral-data \
  meshcentral-files

sudo chmod 600 "$backup_file"

sudo systemctl start meshcentral
trap - EXIT

sudo ls -lh "$backup_file"The archive contains private keys and the MeshCentral database, so the command changes it to mode 0600. The shell trap starts MeshCentral again if the archive command fails.
Store backups on another machine or storage system. A backup kept only on the MeshCentral server does not protect against server or disk loss.
15. Update MeshCentral
Check the currently installed version:
cd /opt/meshcentral
npm list --depth=0 meshcentralPerform a manual update:
cd /opt/meshcentral
sudo systemctl stop meshcentral
trap 'sudo systemctl start meshcentral' EXIT

npm install meshcentral@latest

sudo systemctl start meshcentral
trap - EXIT
sudo systemctl status meshcentral --no-pagerRun NPM as administrator, not through sudo. The EXIT trap starts MeshCentral again if the NPM update fails. Back up meshcentral-data before major upgrades.
MeshCentral now runs as a systemd service under /opt/meshcentral, serves HTTPS directly on port 443, and renews its Let’s Encrypt certificate through Cloudflare DNS-01. The access URL is:
https://meshcentral.maksonlee.com