This guide installs a single-node Teleport cluster (Auth + Proxy + SSH service on one host) on Ubuntu 24.04, secured with a Let’s Encrypt certificate issued using DNS-01 via Cloudflare.
Design goals:
- Teleport is internal-only (LAN/VPN).
teleport.maksonlee.comand*.teleport.maksonlee.comresolve via internal DNS to a private IP.- Cloudflare is used only to create
_acme-challengeTXT records for certificate issuance/renewal (no need to publish a public A record).
Lab context
- OS: Ubuntu 24.04 (noble)
- Teleport hostname (users visit):
teleport.maksonlee.com - Teleport server IP (example):
192.168.0.104 - Certificate names:
teleport.maksonlee.com*.teleport.maksonlee.com(recommended for future App Access subdomains)
What you’ll build
- Teleport Web UI:
https://teleport.maksonlee.com - Teleport Proxy on TCP/443
- Wildcard TLS + wildcard internal DNS support
- Certbot auto-renew + hook to reload Teleport after renewal
- First admin user created via invite link + MFA enrollment in the UI
Prerequisites
Internal DNS: teleport.maksonlee.com + wildcard
In your internal DNS (MikroTik example), create a static entry:
- Name:
teleport.maksonlee.com - Address:
192.168.0.104 - Enable Match Subdomain
This makes all of these resolve to the same server:
teleport.maksonlee.comtest.teleport.maksonlee.com- any
*.teleport.maksonlee.com
Verify from a Windows client:
nslookup teleport.maksonlee.com
nslookup test.teleport.maksonlee.comExpected: both return 192.168.0.104.
Cloudflare API token for Certbot
Create a Cloudflare API Token with minimum permissions:
- Zone → DNS → Edit (scope it to your
maksonlee.comzone)
You do not need a public A record for teleport.maksonlee.com in Cloudflare.
Cloudflare is only used for the _acme-challenge TXT record during renewal.
- Install Teleport (example: v18.6.4)
On the Teleport server:
curl https://cdn.teleport.dev/install.sh | bash -s 18.6.4Confirm:
teleport version
tctl version
tsh versionExpected (example):
Teleport v18.6.4 ...- Install Certbot + Cloudflare DNS plugin
sudo apt update
sudo apt install -y certbot python3-certbot-dns-cloudflare- Create Cloudflare credentials file
Recommended (root-owned):
sudo mkdir -p /root/.secrets/certbot
sudo nano /root/.secrets/certbot/cloudflare.ini
sudo chmod 600 /root/.secrets/certbot/cloudflare.iniFile content:
dns_cloudflare_api_token = <YOUR_CLOUDFLARE_API_TOKEN>- Issue Let’s Encrypt wildcard certificate (DNS-01)
Request both the hostname and wildcard:
sudo certbot certonly \
  --dns-cloudflare \
  --dns-cloudflare-credentials /root/.secrets/certbot/cloudflare.ini \
  -d teleport.maksonlee.com \
-d '*.teleport.maksonlee.com'After success, you will have:
/etc/letsencrypt/live/teleport.maksonlee.com/fullchain.pem/etc/letsencrypt/live/teleport.maksonlee.com/privkey.pem
- Copy TLS certs into
/etc/teleport/tls
Teleport can use your own TLS files. A clean layout is to store them here:
sudo mkdir -p /etc/teleport/tls

sudo install -o root -g root -m 600 \
  /etc/letsencrypt/live/teleport.maksonlee.com/privkey.pem \
  /etc/teleport/tls/privkey.pem

sudo install -o root -g root -m 644 \
  /etc/letsencrypt/live/teleport.maksonlee.com/fullchain.pem \
/etc/teleport/tls/fullchain.pem- Generate
/etc/teleport.yaml
Generate a Teleport config that advertises teleport.maksonlee.com:443:
sudo teleport configure -o file \
  --cluster-name=teleport.maksonlee.com \
  --public-addr=teleport.maksonlee.com:443 \
  --cert-file=/etc/teleport/tls/fullchain.pem \
--key-file=/etc/teleport/tls/privkey.pemTeleport writes:
- Config:
/etc/teleport.yaml - Data directory:
/var/lib/teleport
- Start Teleport (systemd)
Enable + start:
sudo systemctl enable --now teleport
systemctl status teleport --no-pagerAt this point, the UI should be reachable at:
- https://teleport.maksonlee.com
- Create the first admin user (invite URL)
Create your initial user:
sudo tctl users add teleport-admin \
  --roles=editor,access \
--logins=root,ubuntu,administratorTeleport prints a one-time invite URL valid for 1 hour, like:
https://teleport.maksonlee.com:443/web/invite/<token>
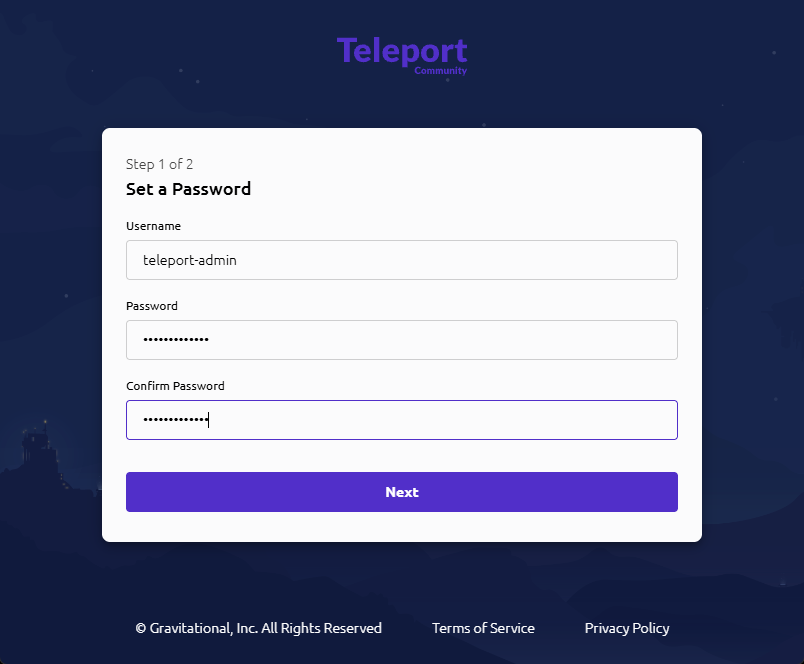
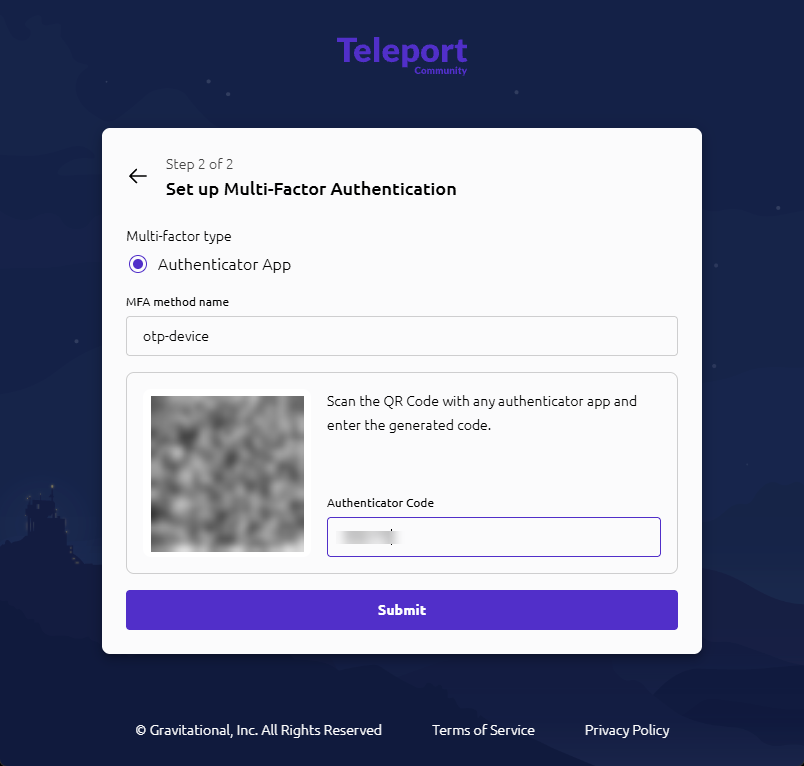
- Complete first login in the Web UI (password + MFA)
Open the invite URL in a browser and finish onboarding:
- Welcome to Teleport → click Get started
- Set a Password → enter and confirm your password
- Set up Multi-Factor Authentication
- Choose Authenticator App
- Scan the QR code in Google Authenticator / Microsoft Authenticator / Authy
- Enter the 6-digit code and click Submit
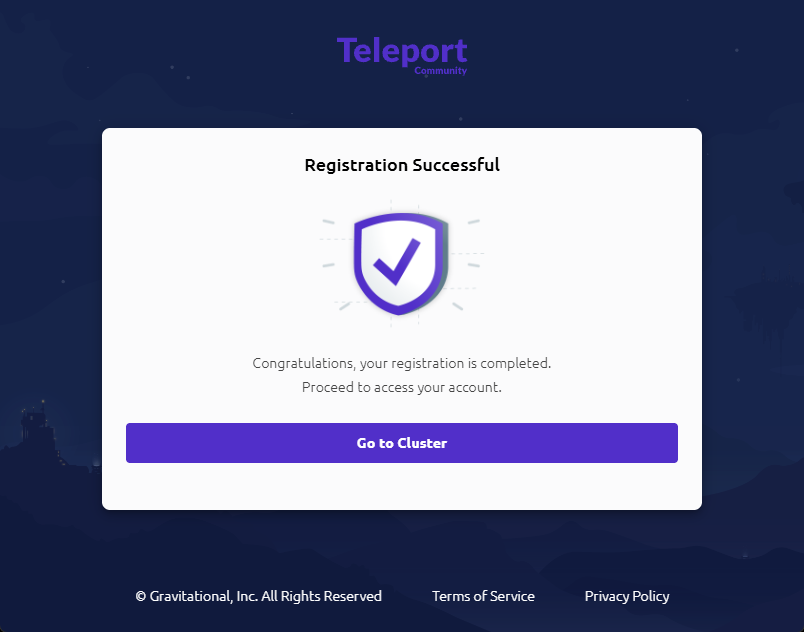
- Registration Successful → click Go to Cluster
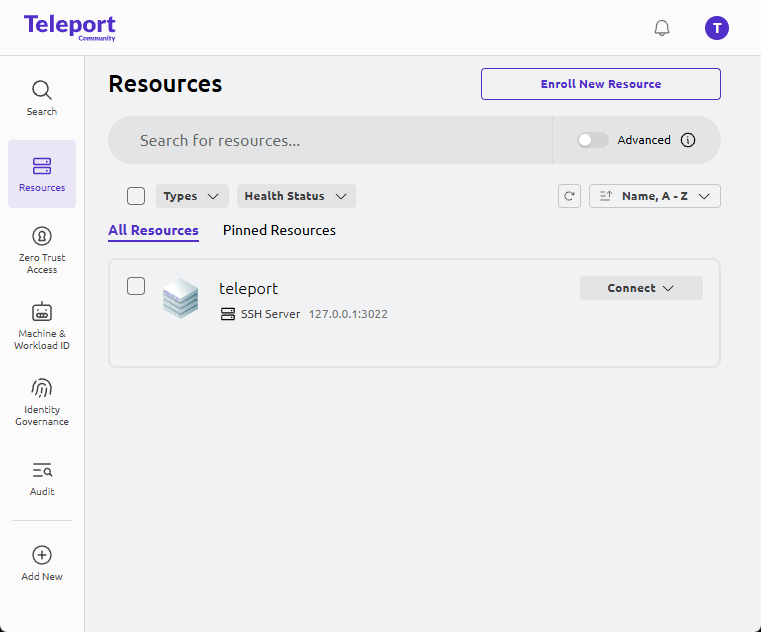
After login, you should land on Resources, and Teleport typically already shows the Teleport server itself as an SSH resource.

- Auto-renew: update
/etc/teleport/tlsand restart Teleport
Certbot renews files under /etc/letsencrypt/live/....
Since we copied certs to /etc/teleport/tls, we add a deploy hook:
sudo tee /etc/letsencrypt/renewal-hooks/deploy/90-teleport.sh >/dev/null <<'EOF'
#!/usr/bin/env bash
set -euo pipefail

install -o root -g root -m 600 \
  /etc/letsencrypt/live/teleport.maksonlee.com/privkey.pem \
  /etc/teleport/tls/privkey.pem

install -o root -g root -m 644 \
  /etc/letsencrypt/live/teleport.maksonlee.com/fullchain.pem \
  /etc/teleport/tls/fullchain.pem

systemctl restart teleport
EOF

sudo chmod +x /etc/letsencrypt/renewal-hooks/deploy/90-teleport.shTest renew path:
sudo certbot renew --dry-runDid this guide save you time?
Support this site