You can easily allow users to log in to your Keycloak realm using their Google accounts. This guide walks you through setting up the consent screen, creating a client in the Google Auth Platform, and configuring Keycloak to accept Google login
Prerequisites
- Keycloak instance:
https://keycloak.maksonlee.com - Realm name:
maksonlee.com - A Gmail account (e.g.,
yourname@gmail.com) - A Google Cloud project (e.g.,
maksonlee)
- Enable the People API
Visit: https://console.cloud.google.com/apis/library
- Search for People API
- Click Enable
- Configure the Google Consent Screen
Go to: https://console.cloud.google.com/apis/credentials/consent
- App Information
- App name:
Keycloak Login - User support email:
yourname@gmail.com
- App name:
- Audience
- Select External
- Contact Information
- Developer contact email:
yourname@gmail.com
- Developer contact email:
- Finish
- Check: “I agree to the Google API Services: User Data Policy”
- Click Continue, then Create
- Create a Client in Google Auth Platform
Go to: https://console.cloud.google.com/auth/clients
- Click Create client
- Fill out:
- Application type: Web application
- Name:
Keycloak OAuth
- Under Authorized redirect URIs, add: rubyCopyEdit
https://keycloak.maksonlee.com/realms/maksonlee.com/broker/google/endpoint - Click Create
- Copy the Client ID and Client Secret
- Add Google as an Identity Provider in Keycloak
- Log in to:
https://keycloak.maksonlee.com/admin - Select realm:
maksonlee.com - Go to:
Identity Providers → Add provider → Google - Enter:
Client ID
Client Secret - Click Save
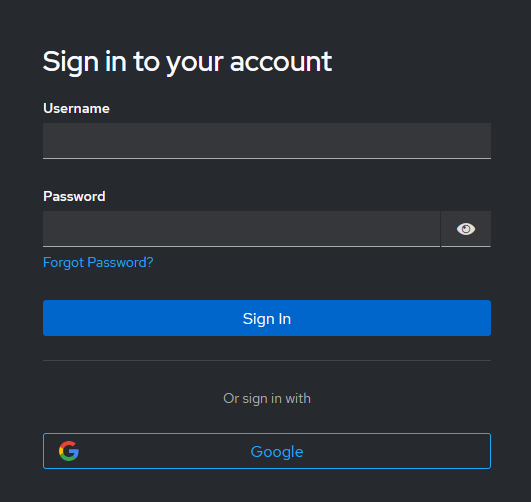
- Test Login
Visit:
https://keycloak.maksonlee.com/realms/maksonlee.com/account
You should now see a Google login button. Log in and confirm it redirects back to your Keycloak realm with your Google account.
Did this guide save you time?
Support this site