Example device used below: Samsung Galaxy S21 (One UI). Other phones are nearly identical, the only difference is where Build number lives.
TL;DR
- Settings → About phone → Software information → tap Build number 7× → enter PIN → Developer options appears.
- Developer options → USB debugging → ON → connect USB → tap Allow.
- Developer options → Wireless debugging → ON → Pair device with pairing code →
adb pair <PHONE_IP>:<PAIRING_PORT>→ thenadb connect <PHONE_IP>:<ADB_PORT>.
Prerequisites (Computer)
- Install the latest Android SDK Platform-Tools (includes
adb). Check:
adb --versionIf it’s old, update Platform-Tools (r30.0.5+ supports adb pair; any current release is fine).
- Phone and computer on the same Wi-Fi/subnet (no AP/client isolation).
- Windows only: if USB doesn’t enumerate, install your OEM USB driver or Google USB Driver.
- Turn On Developer Options
- S21 / One UI path: Settings → About phone → Software information → tap Build number 7× → enter your PIN.
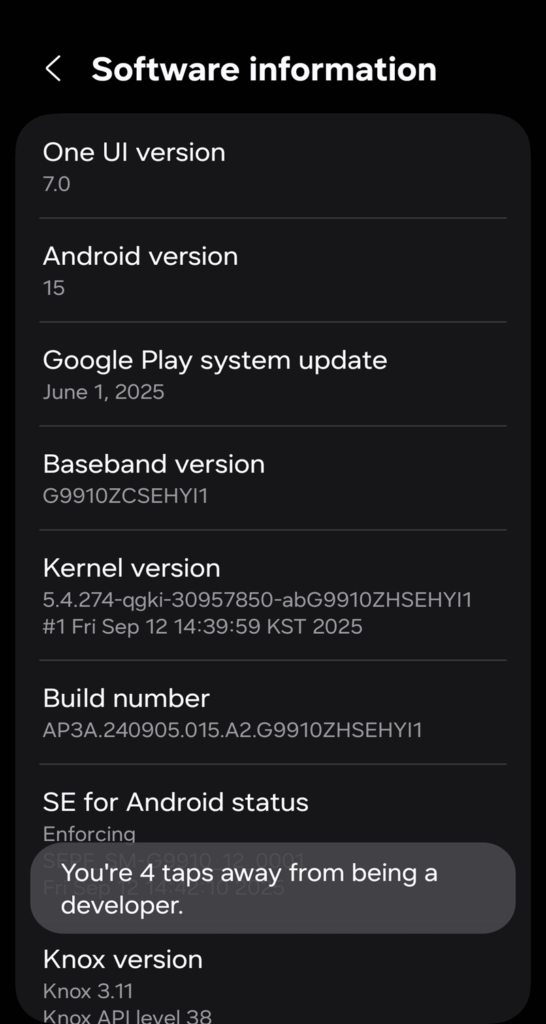
- Back to Settings → Developer options is now visible near the bottom.
For other brands the location of Build number differs, but the “tap 7×” step is the same.
- Enable USB Debugging and Authorize Your Computer
- Settings → Developer options → toggle USB debugging ON.
- Connect the phone via USB.
- On the phone, tap Allow on “Allow USB debugging?” (you can check Always allow from this computer).
Verify from the computer:
adb devices
# Expect: <serial> deviceIf you see unauthorized, re-plug USB and accept the RSA prompt on the phone.
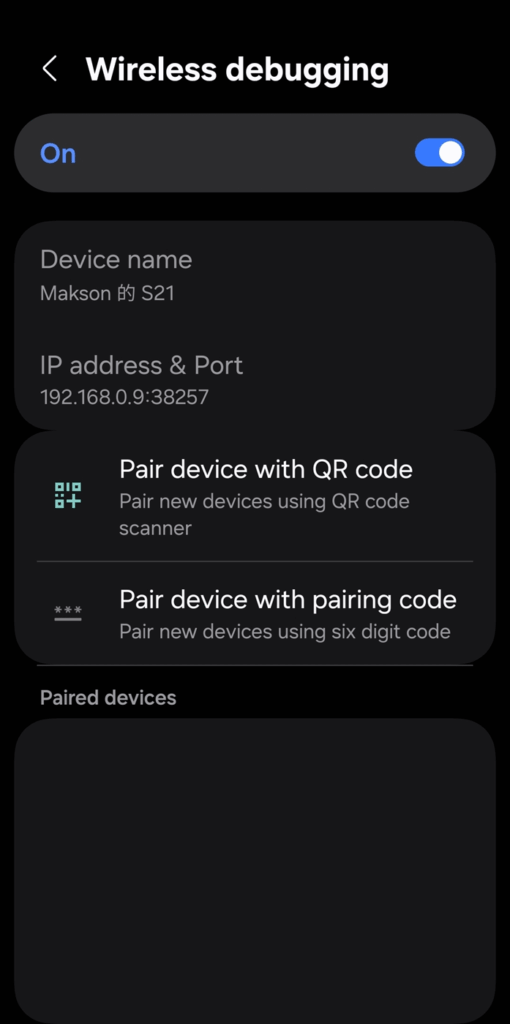
- Enable Wi-Fi (Wireless) Debugging — Android 11+
- Phone: Settings → Developer options → Wireless debugging → ON.
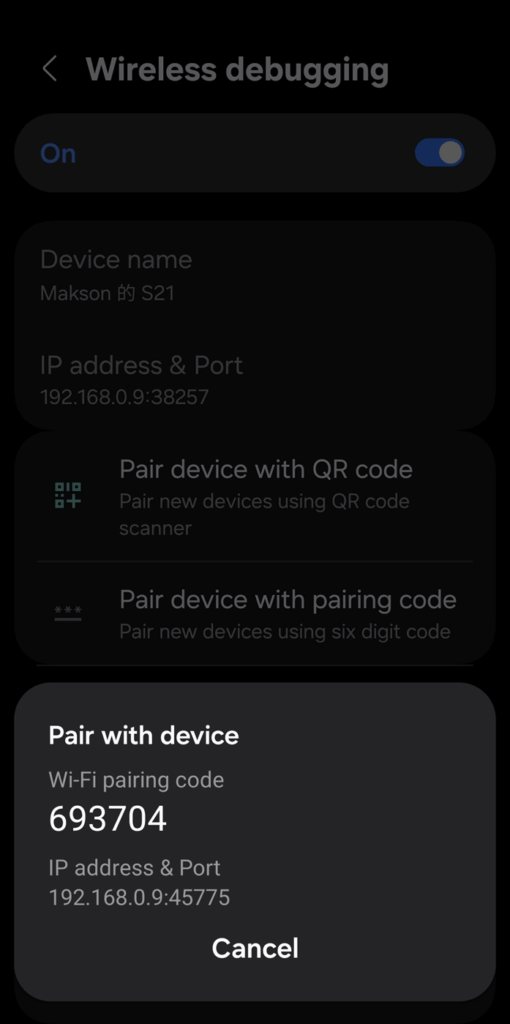
- Tap Pair device with pairing code (or Pair with QR code).
- You’ll see a 6-digit code and
<PHONE_IP>:<PAIRING_PORT>.
- You’ll see a 6-digit code and
- Computer:
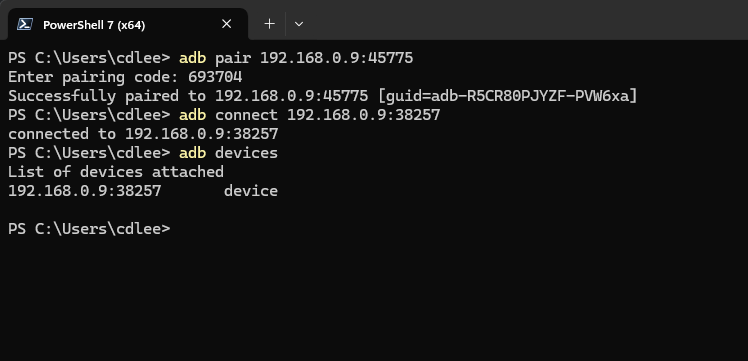
Important: the pairing port and the ADB service port are different. Pair first, then connect.
Did this guide save you time?
Support this site