This guide is a continuation of our previous tutorial:
How to Install Redmine 6.0.6 on Ubuntu 24.04 with PostgreSQL, RVM, Ruby, and HAProxy SSL
To enable OAuth login in Redmine, we will integrate it with Keycloak as an OpenID Connect provider.
Before you begin: You must already have a working Keycloak instance. If you haven’t set it up yet, follow this guide:
Install Keycloak with MariaDB and NGINX Reverse Proxy (SSL Termination)
- Install the Redmine OAuth Plugin
SSH into your server and run:
sudo su - redmine
cd /opt/redmine-6.0.6/plugins/
git clone https://github.com/kontron/redmine_oauth.git
cd ..
bundle install
exit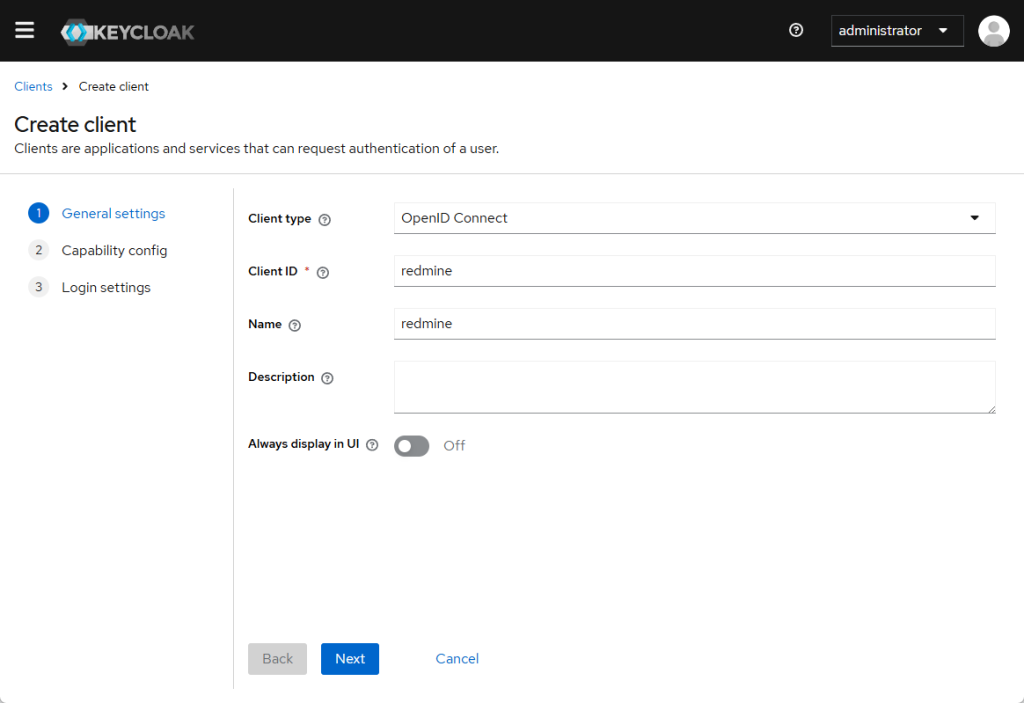
sudo systemctl restart redmine- Create a Client in Keycloak
- Open the Keycloak admin panel at
https://keycloak.maksonlee.com - Select your realm (e.g.,
maksonlee.com) - Go to Clients → Create:
- Client ID:
redmine - Client Protocol:
openid-connect - Root URL:
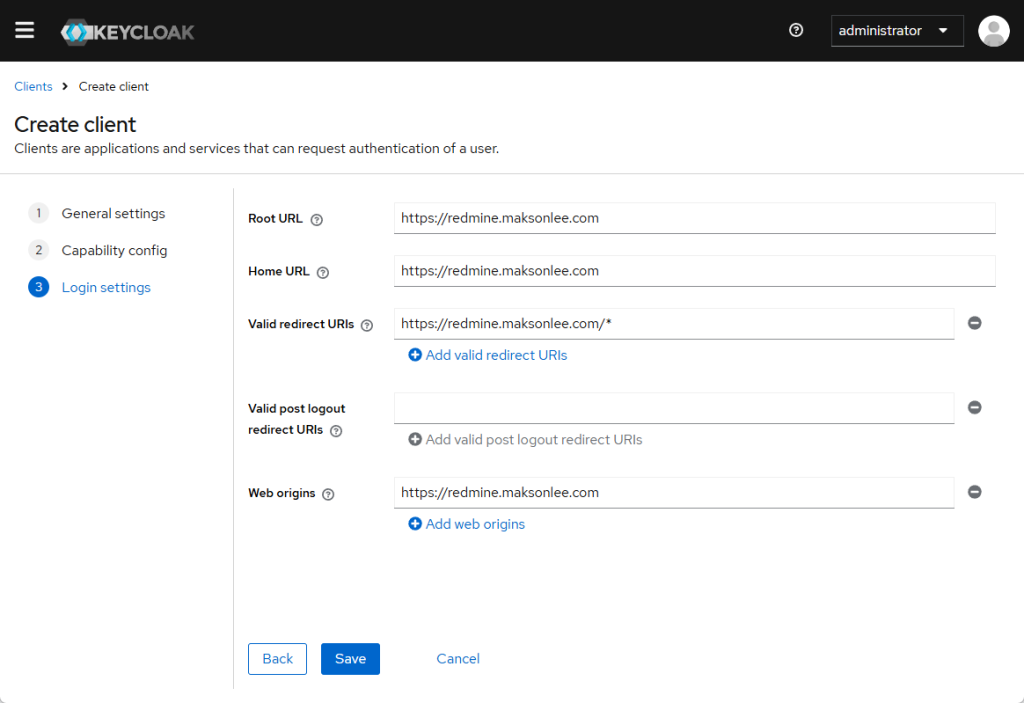
https://redmine.maksonlee.com
- Client ID:
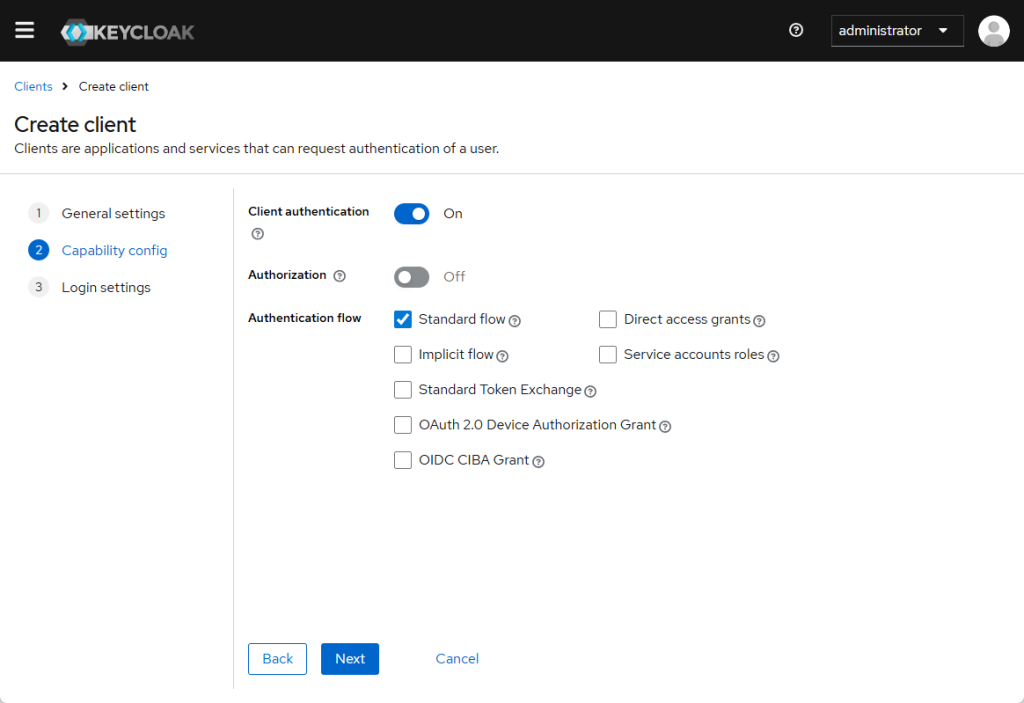
- Save and configure:
- Access Type:
confidential - Valid Redirect URIs:
https://redmine.maksonlee.com/* - Standard Flow Enabled: ✅
- Access Type:
- Go to the Credentials tab and copy the Client Secret
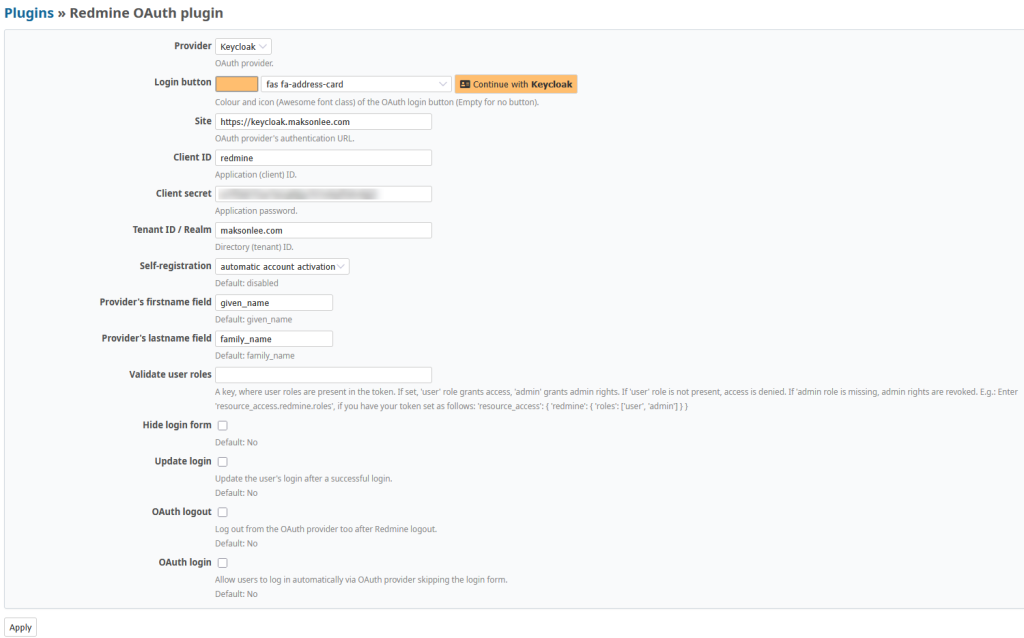
- Configure the Redmine OAuth Plugin
Log into Redmine as an admin and go to:
Administration → Plugins → Redmine OAuth plugin → Configure
Use the following settings:
| Setting | Value |
|---|---|
| Provider | keycloak |
| Login button | btn-primary fab fa-key |
| Site | https://keycloak.maksonlee.com |
| Client ID | redmine |
| Client secret | (paste the value from Keycloak) |
| Tenant ID / Realm | maksonlee.com |
| Self-registration | automatic account activation |
| Provider’s firstname | given_name |
| Provider’s lastname | family_name |
| Validate user roles | (optional) |
| Hide login form | No |
| Update login | No |
| OAuth logout | No |
| OAuth login | No |
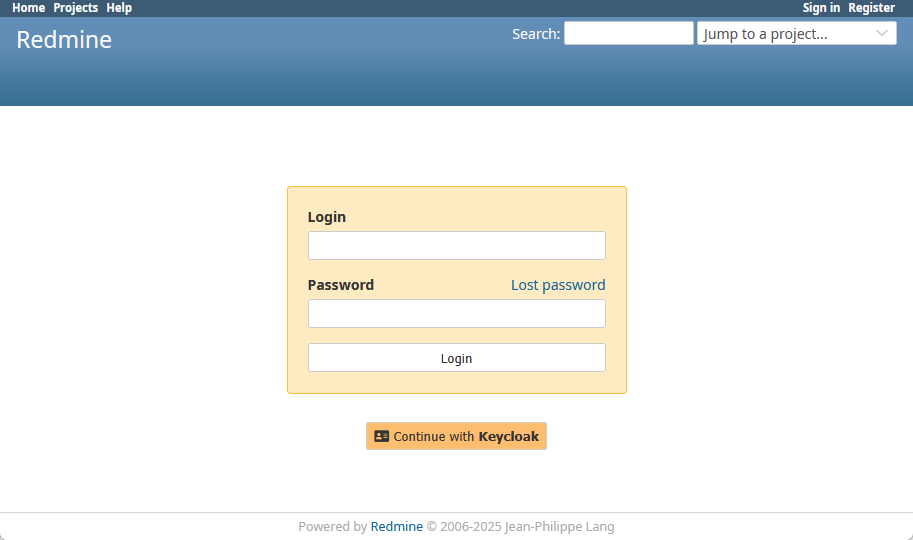
- Test the Integration
- Open your Redmine login page
- Click the Keycloak login button
- Log in with your Keycloak credentials
- Redmine should auto-create or map the user profile
Did this guide save you time?
Support this site