
Upgrading from ThingsBoard CE 4.3 to ThingsBoard 4.4 changes the licensing model as well as the software. This guide covers the Community Grant application and the upgrade of a standalone Ubuntu DEB installation.
Before upgrading: device limits and the option to stay on 4.3
ThingsBoard 4.4 combines CE and PE under Business Source License 1.1. Production deployments require a license key. For existing CE installations, the Community Grant provides a fixed capacity at no charge.
Evaluate future device growth before upgrading. Once the grant is full, new devices beyond the licensed capacity cannot be added until you increase the licensed capacity. Existing devices and services keep running, but further expansion requires purchasing additional capacity through the License Portal.
You can choose to keep using ThingsBoard CE 4.3. It remains under Apache 2.0, without the 4.4 license-key and device-capacity restrictions. Official security updates for CE 4.3 end on July 20, 2027, although the software can continue running afterward. See the licensing announcement for details.
Environment
- Operating system: Ubuntu Server 26.04, amd64.
- Upgrade: ThingsBoard CE
4.3.1.6-1to4.4.0-1. - Java: OpenJDK 21 to OpenJDK 25.
- Database and queue: PostgreSQL 18.6 on the host; Kafka 4.0 in Docker.
- Service:
thingsboard.service, direct HTTPS on 443, MQTT on 1883, and MQTT over TLS on 8883.
Run the commands on the ThingsBoard server with sudo access. The examples use a local PostgreSQL database named thingsboard; adjust connection settings and paths for your installation.
1. Update CE to the latest 4.3 patch
The official upgrade guide requires the latest 4.3 LTS patch before migration. This installation was updated to 4.3.1.6, which provides the Get your Community Grant button on the Home page.
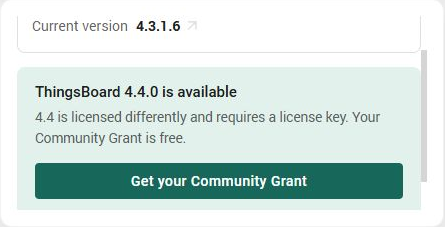
Obtain the issued grant key before installing 4.4. CE can continue running while the application is processed.
2. Register the existing deployment
Select Get your Community Grant → Register this deployment to open the License Portal.
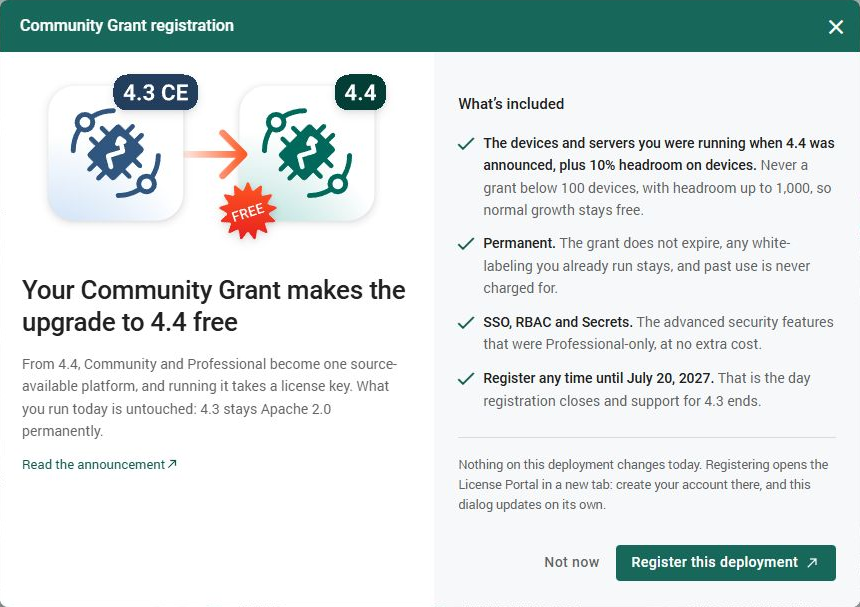
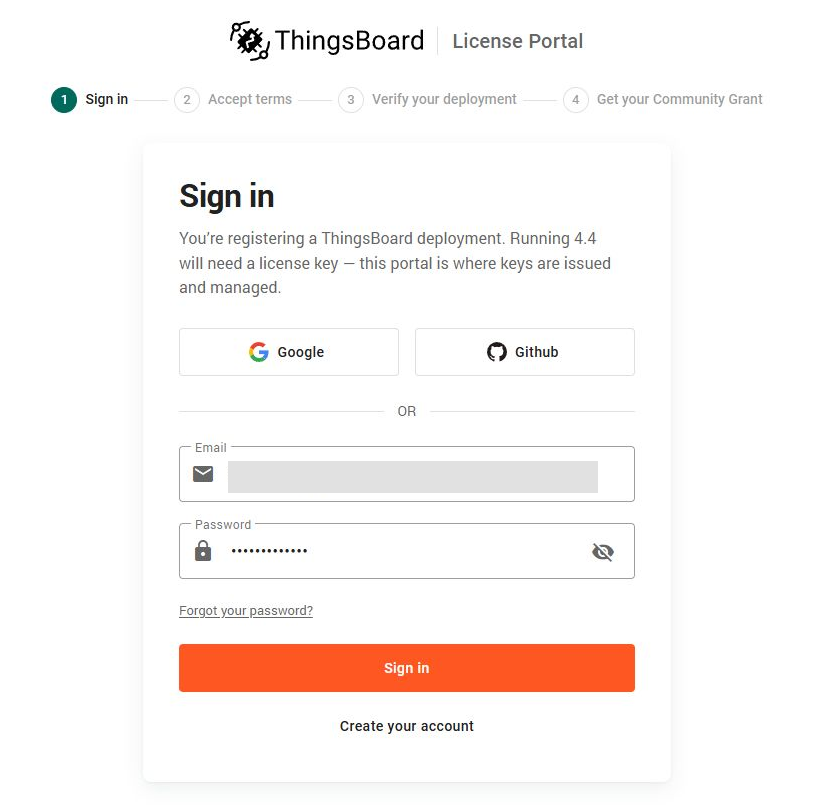
Sign in with your ThingsBoard License Portal account, or create one if needed.
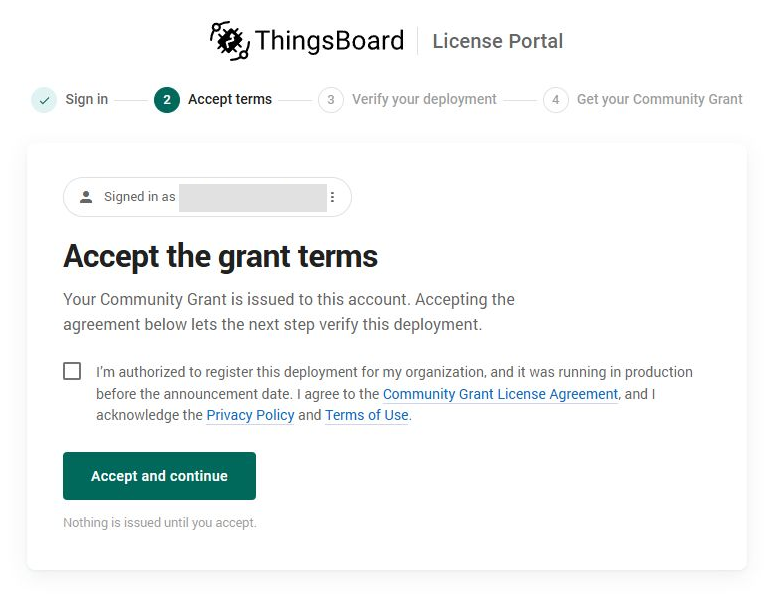
Review the terms and deployment eligibility declaration, then select Accept and continue if your deployment qualifies.
Some applications require manual review after the automatic checks. If requested, provide the deployment history and provisioning context, then wait for approval.
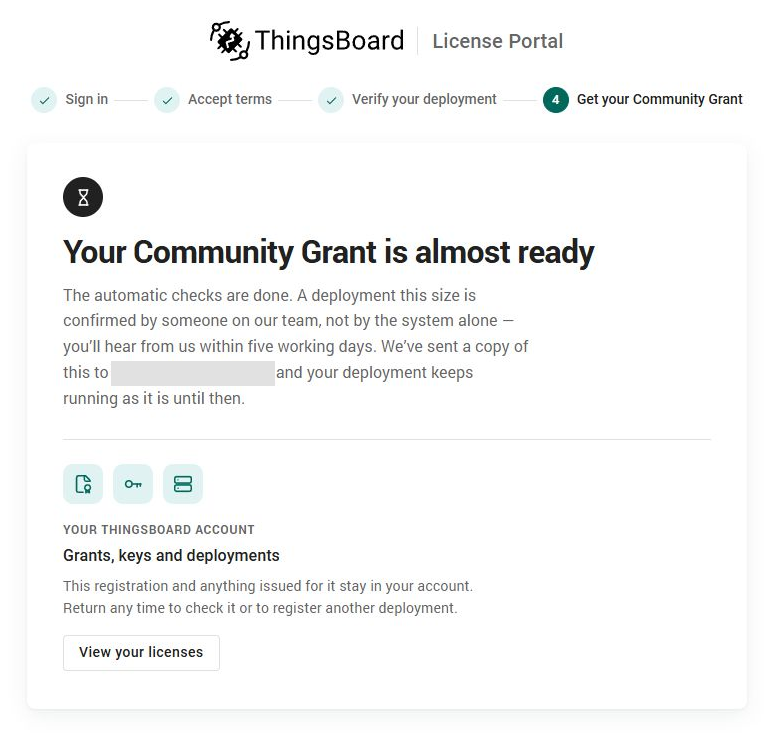
3. Check the issued grant
When the portal shows Your Community Grant is ready, check its device, production-instance, and Edge limits and save the key privately.
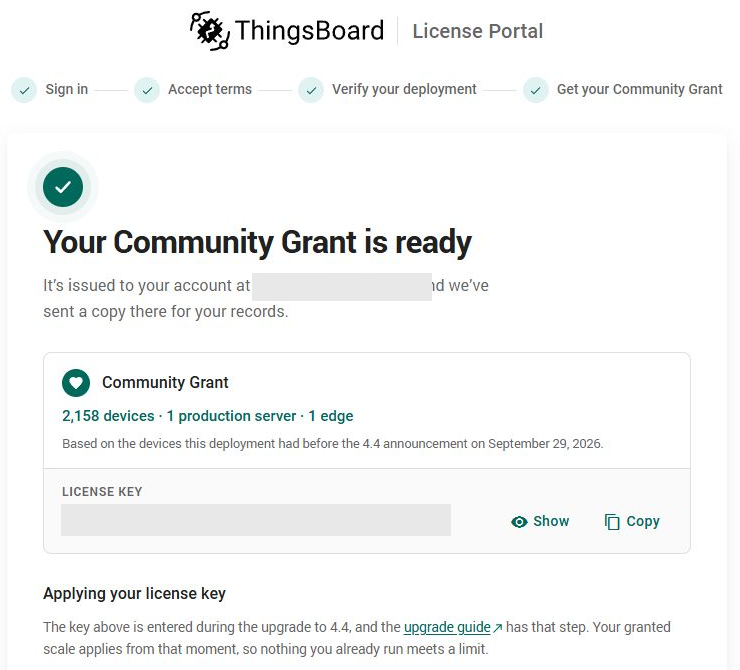
This grant covers 2,158 devices from a baseline of 1,958. The 10% headroom is rounded up to the next 10: 1,958 + 200 = 2,158. That leaves 200 additional slots; the headroom does not grow as devices are added.
4. Back up the existing installation
Check the installed version and service state:
dpkg-query -W -f='${Version}\n' thingsboard
java -version
sudo systemctl status thingsboard --no-pagerStop ThingsBoard for the maintenance window. Leave PostgreSQL and Kafka running:
sudo systemctl stop thingsboard
sudo systemctl is-active thingsboardConfirm the service is inactive, then back up the database and PostgreSQL roles:
set -o pipefail
backup_dir="/var/backups/thingsboard-before44-$(date -u +%Y%m%dT%H%M%SZ)"
sudo install -d -m 0700 "$backup_dir"

sudo -u postgres pg_dump -Fc -d thingsboard |
  sudo tee "$backup_dir/thingsboard.pgdump" >/dev/null
sudo -u postgres pg_dumpall --globals-only |
  sudo tee "$backup_dir/postgres-globals.sql" >/dev/null
sudo chmod 0600 "$backup_dir/thingsboard.pgdump" \
  "$backup_dir/postgres-globals.sql"

sudo pg_restore --list "$backup_dir/thingsboard.pgdump" >/dev/null
sudo pg_restore --file=/dev/null "$backup_dir/thingsboard.pgdump"Also save /etc/thingsboard, systemd overrides, TLS certificates and private keys, renewal scripts, custom extensions, and the original CE package. Copy the backup off the server.
Before proceeding, test the dump by restoring it into a separate temporary database and checking the restored data. The pg_restore commands above check the archive; they do not perform that restore test.
5. Install Java 25 and the font dependencies
ThingsBoard 4.4 requires Java 25 and font libraries:
sudo apt update
sudo apt install openjdk-25-jdk-headless libharfbuzz0b fontconfig fonts-dejavu-core
sudo update-alternatives --set java \
  "/usr/lib/jvm/java-25-openjdk-$(dpkg --print-architecture)/bin/java"
java -versionConfirm Java 25 is selected. Update any explicit Java path in your service configuration as well.
6. Install the 4.4 package and merge the configuration
Download the official 4.4 DEB and inspect its package metadata:
mkdir -p ~/thingsboard-44
cd ~/thingsboard-44
curl -fL --retry 3 -o thingsboard-4.4.deb \
  https://github.com/thingsboard/thingsboard/releases/download/v4.4/thingsboard-4.4.deb
dpkg-deb -f thingsboard-4.4.deb Package Version Architecture
sha256sum thingsboard-4.4.debFor this amd64 installation, the package version is 4.4.0-1. Install it:
sudo dpkg -i thingsboard-4.4.debIf prompted about thingsboard.conf, install the new maintainer version, then merge your settings from the saved old file. Preserve the database connection, Kafka settings, HTTPS and MQTT TLS configuration, certificate paths, and service overrides.
Finish the merge before migrating the database, then check the file’s syntax:
sudo bash -n /etc/thingsboard/conf/thingsboard.conf7. Migrate the CE database
With ThingsBoard stopped and the configuration merged, run:
sudo /usr/share/thingsboard/bin/install/upgrade.sh --fromVersion=CEWait for ThingsBoard upgraded successfully! before starting the service.
On this server, the installer initially failed to bind HTTPS port 443 because it did not inherit the normal service’s binding capability. After confirming that migration had not started, I ran it with a temporary loopback port:
sudo env JAVA_TOOL_OPTIONS="-Dserver.port=0 -Dserver.address=127.0.0.1" \
/usr/share/thingsboard/bin/install/upgrade.sh --fromVersion=CEUse this only for that pre-migration port-binding failure. It changes the installer’s HTTP listener for that run; the service keeps its configured HTTPS port. Do not repeat a completed CE migration.
8. Start ThingsBoard and activate the grant
Start the upgraded service and follow the startup log:
sudo systemctl start thingsboard
sudo systemctl status thingsboard --no-pager
sudo tail -f /var/log/thingsboard/thingsboard.logOpen the web interface, enter the issued Community Grant key, and sign in with your existing account. Successful activation produces License client initialized; instance ACTIVATED. in the log.
After activation, restrict access to the license cache and set a private file-creation mask for the service:
sudo install -d -m 0755 /etc/systemd/system/thingsboard.service.d
sudo tee /etc/systemd/system/thingsboard.service.d/20-license-private-files.conf >/dev/null <<'EOF'
[Service]
UMask=0077
EOF
sudo chmod 0700 /var/lib/thingsboard/license
sudo chmod 0600 /var/lib/thingsboard/license/instance-license.data
sudo systemctl daemon-reload
sudo systemctl restart thingsboard
sudo stat -c '%a %U:%G %n' /var/lib/thingsboard/license/instance-license.dataThe cache path above is from the DEB installation used here; confirm it exists before applying these permissions.
9. Check the upgrade and licensed features
On the Home page, confirm version 4.4.0 and the active Community Grant. Check that existing devices, dashboards, and rule chains are present.
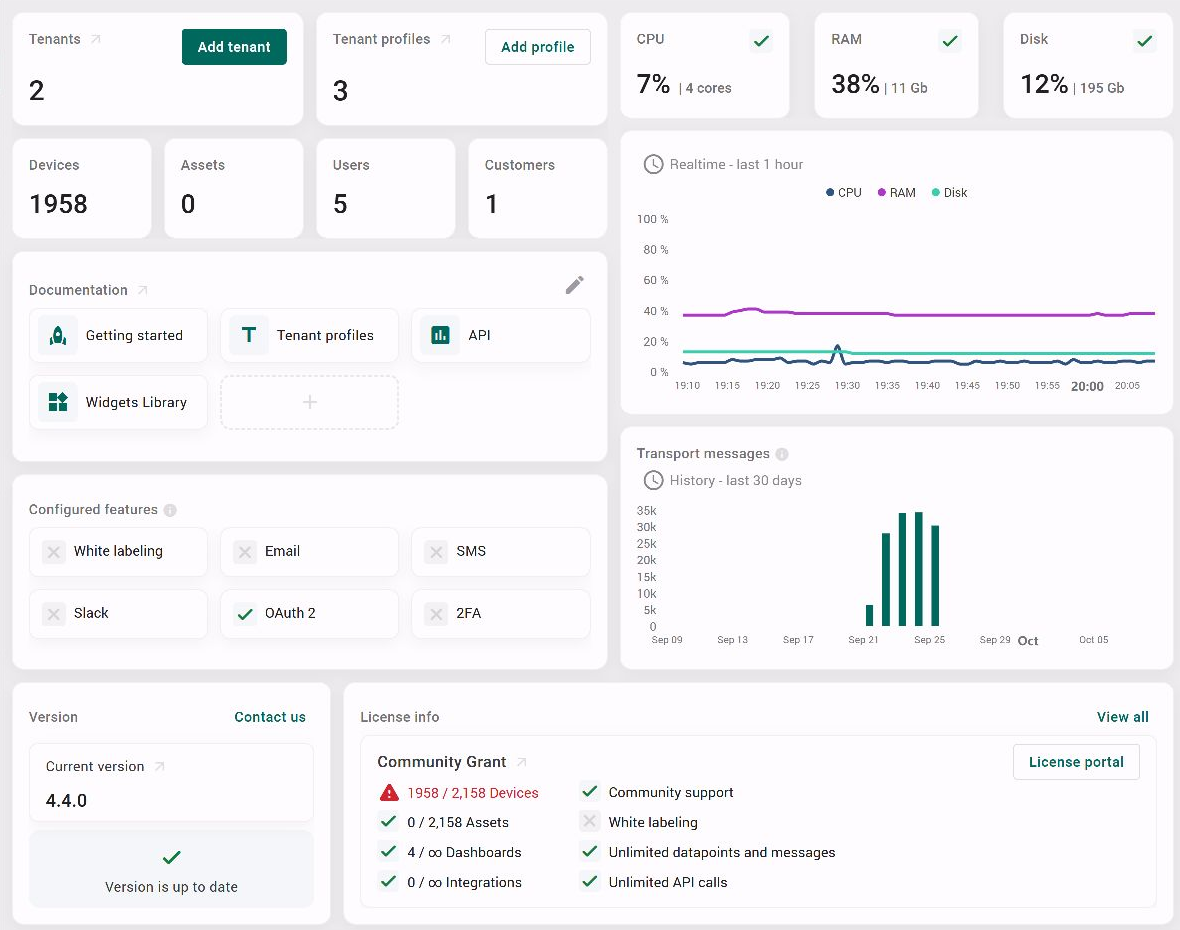
Publish telemetry from a test device and check its dashboard. Review the application log for transport, database, or license errors.
Open License Management to confirm the grant type, usage, and limits:
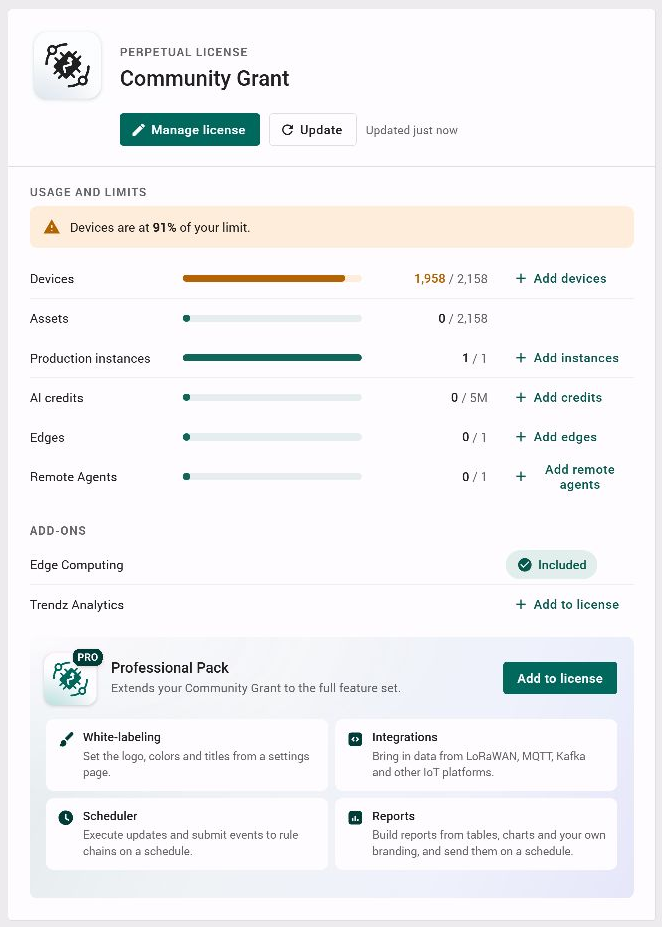
Professional Pack adds White-labeling, Integrations, Scheduler, and Reports. The Add to license button shows it is available as a separate purchase and is not included in this Community Grant. Buying the pack does not increase the device limit.