This guide shows how to configure Jenkins to authenticate users via Keycloak using OpenID Connect (OIDC). It’s based on:
- Jenkins:
2.504.2 - Keycloak:
26.2.5 - Plugin:
OpenID Connect Authentication v4.494.v6b_f419104767
Prerequisites
- Jenkins is publicly accessible at:
https://jenkins.maksonlee.com - Keycloak is running at:
https://keycloak.maksonlee.com - You have admin access to both Jenkins and Keycloak
- You’ve created a Keycloak realm (e.g.
maksonlee.com)
- Install OpenID Connect Plugin in Jenkins
- Go to: Manage Jenkins → Plugin Manager → Available
- Search for:
OpenId Connect Authentication - Install the plugin and restart Jenkins
- Create Client in Keycloak for Jenkins
General Settings:
- Navigate to: Clients → Create client

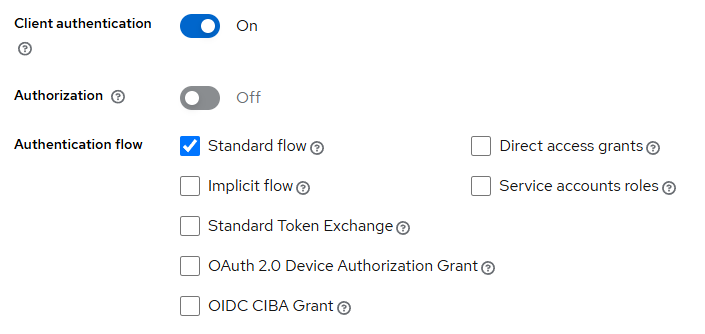
Capability Configuration:
Login Settings:
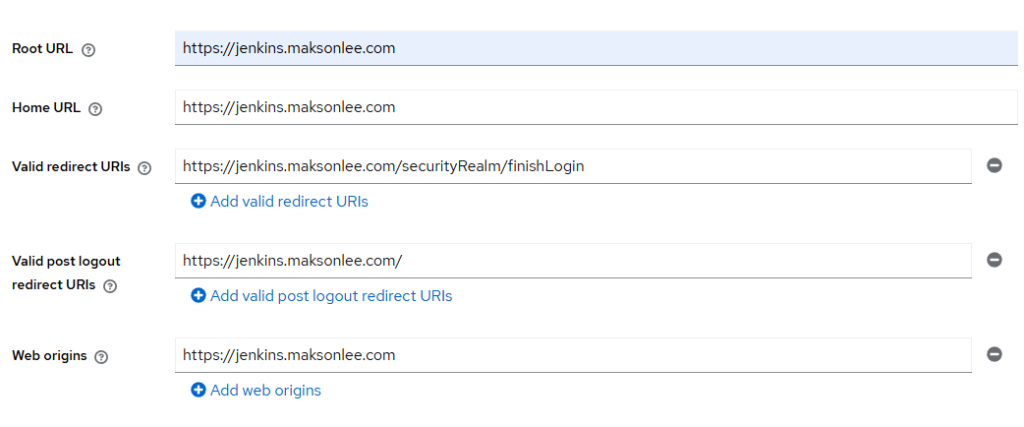
Click Save
- Get the Client Secret
- Go to: Clients → jenkins → Credentials
- Copy the Client Secret for use in Jenkins
- Configure Jenkins with Keycloak OIDC
Go to: Manage Jenkins → Security
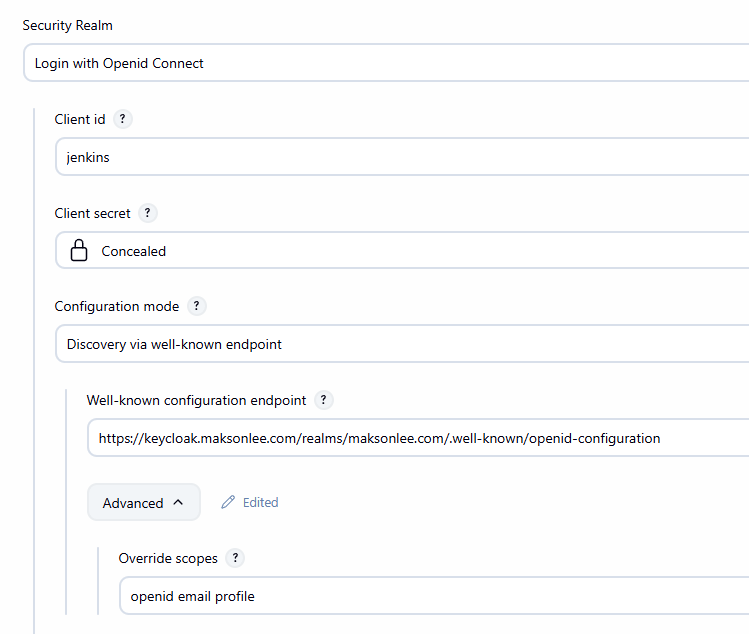
Set the Security Realm: Login with Openid Connect
Then fill in:
| Field | Value |
|---|---|
| Client ID | jenkins |
| Client Secret | (paste from Keycloak) |
| Well-known endpoint | https://keycloak.maksonlee.com/realms/maksonlee.com/.well-known/openid-configuration |
| Advanced -> Override scopes | openid email profile |
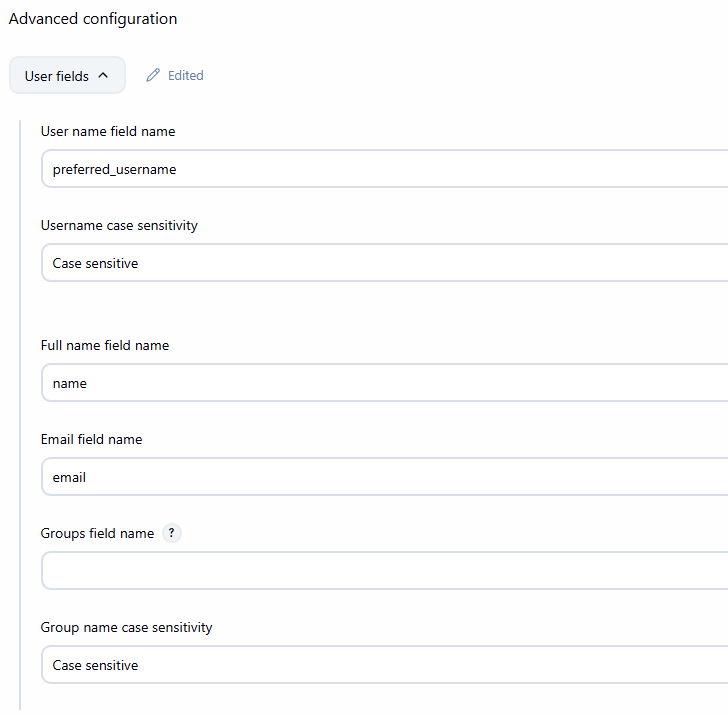
Advanced configuration → User fields
| Jenkins Field | Keycloak Claim |
|---|---|
| User name field name | preferred_username |
| Email field name | email |
| Full name field name | name |
Allow API tokens for CLI / automation
If you plan to use Jenkins API tokens from scripts, Jenkins CLI, or tools like Backstage, you should relax one OIDC default.
In the Security configuration section, enable:
Allow access using a Jenkins API token without an OIDC Session
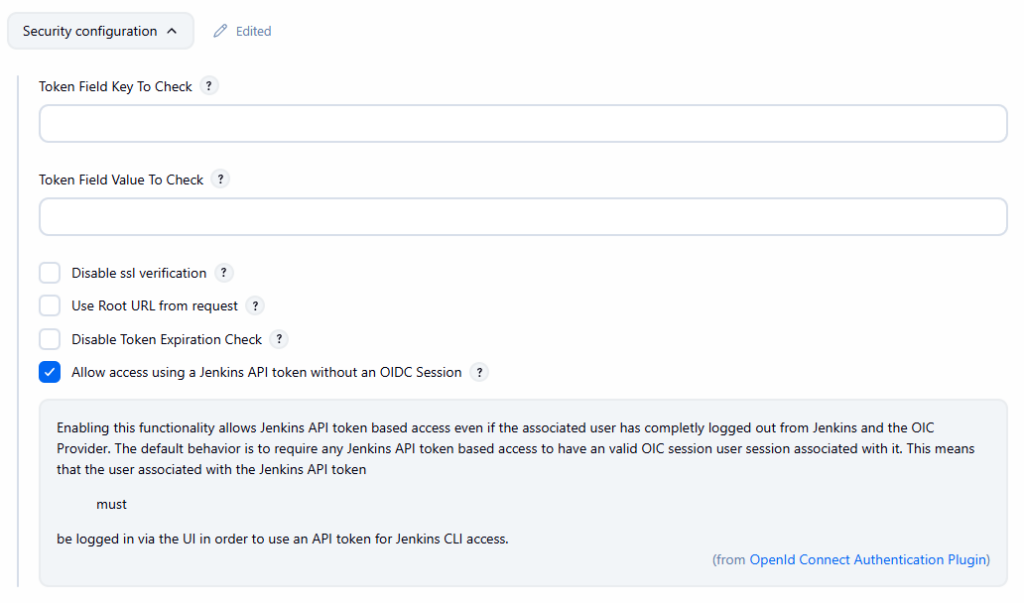
Click Save
- Test Login
- Log out of Jenkins
- You’ll be redirected to Keycloak for authentication
- Once authenticated, you’ll be signed into Jenkins
Did this guide save you time?
Support this site