Introduction
This guide walks you through installing Gerrit 3.11.2 on Ubuntu 24.04, using Java 21 and a dedicated system user. The installation is done in development mode using the embedded Jetty server and H2 database, and Gerrit is managed with systemd as a background service.
Authentication is handled via Gerrit’s default development mode, allowing you to log in directly as admin with no password.
- Install Java 21
sudo apt update
sudo apt install openjdk-21-jdk -yVerify:
java -versionYou should see something like:
openjdk version "21" ...- Create the
gerritSystem User
sudo groupadd --system --gid 2001 gerrit

sudo useradd --system --uid 2001 --gid 2001 \
  --home /home/gerrit \
  --shell /bin/bash \
  --create-home \
gerrit- Create the Gerrit Installation Directory
sudo mkdir -p /srv/gerrit
sudo chown gerrit:gerrit /srv/gerrit- Download and Initialize Gerrit 3.11.2
Switch to the gerrit user:
sudo su - gerritDownload the Gerrit WAR file:
wget https://gerrit-releases.storage.googleapis.com/gerrit-3.11.2.war -O gerrit.warInitialize Gerrit:
java -jar gerrit.war init --batch --dev -d /srv/gerritGerrit will be started automatically after initialization.
Exit the user shell:
exit- Confirm Gerrit is Running
You can check that Gerrit is running with:
sudo -u gerrit /srv/gerrit/bin/gerrit.sh statusIf needed, you can stop it with:
sudo -u gerrit /srv/gerrit/bin/gerrit.sh stop- Configure Gerrit as a systemd Service
Create the service unit file:
sudo vi /etc/systemd/system/gerrit.servicePaste:
[Unit]
Description=Gerrit Code Review
After=network.target

[Service]
Type=simple
LimitNOFILE=65536
User=gerrit
ExecStart=/usr/bin/java -jar /srv/gerrit/bin/gerrit.war daemon -d /srv/gerrit
RemainAfterExit=yes
Restart=on-failure
OOMScoreAdjust=-1000

[Install]
WantedBy=multi-user.targetEnable and start Gerrit via systemd:
sudo systemctl daemon-reload
sudo systemctl enable --now gerritVerify it’s active:
sudo systemctl status gerritExpected:
Active: active (running)- Access Gerrit Web UI
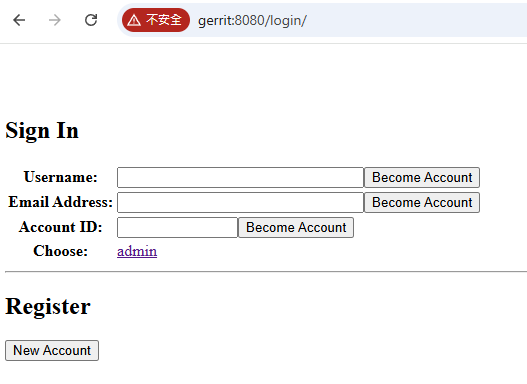
Open your browser and go to:
http://gerrit:8080
You’ll see a login screen. Under “Choose”, click on: “admin”, that logs you in as the default administrator (no password required in dev mode).
Did this guide save you time?
Support this site