This post shows how to authenticate WordPress (https://www.maksonlee.com) against Keycloak (https://keycloak.maksonlee.com) using OpenID Connect (OIDC) with a WordPress plugin (no custom PHP). We’ll create a confidential OIDC client in Keycloak (Client ID + Client Secret) and configure WordPress to log in via Standard flow (Authorization Code).
Lab context
- WordPress:
https://www.maksonlee.com - Keycloak:
https://keycloak.maksonlee.com - Realm:
maksonlee.com - Client ID:
maksonlee-wp
- Verify OIDC discovery works
Run:
curl -s https://keycloak.maksonlee.com/realms/maksonlee.com/.well-known/openid-configurationYou should see endpoints like:
- Authorization:
.../protocol/openid-connect/auth - Token:
.../protocol/openid-connect/token - Userinfo:
.../protocol/openid-connect/userinfo - Logout:
.../protocol/openid-connect/logout
- Create the Keycloak client
Keycloak Admin Console → Realm maksonlee.com → Clients → Create client
General settings
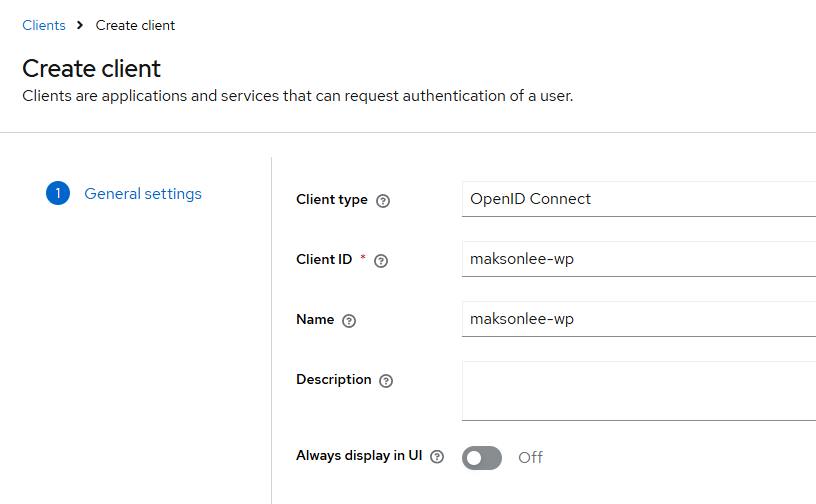
- Client type: OpenID Connect
- Client ID:
maksonlee-wp - Name:
maksonlee-wp
Click Next.
Capability config
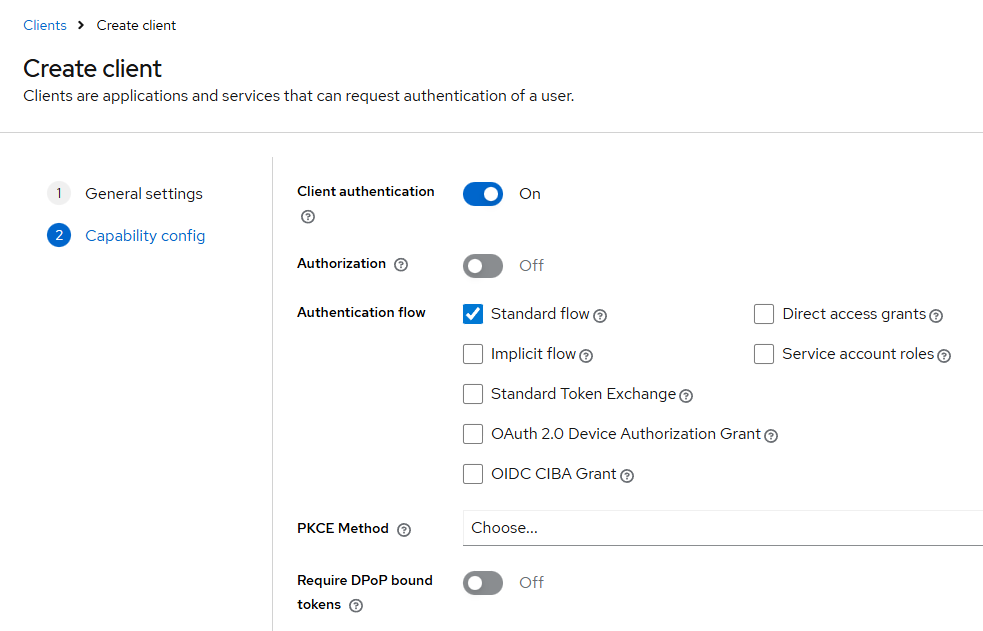
Set:
- Client authentication: On
- Authorization: Off
- Authentication flow:
- ✅ Standard flow
- ⛔ Direct access grants
- ⛔ Implicit flow
- ⛔ Service account roles
- PKCE / DPoP: leave default/off
Click Next.
Login settings
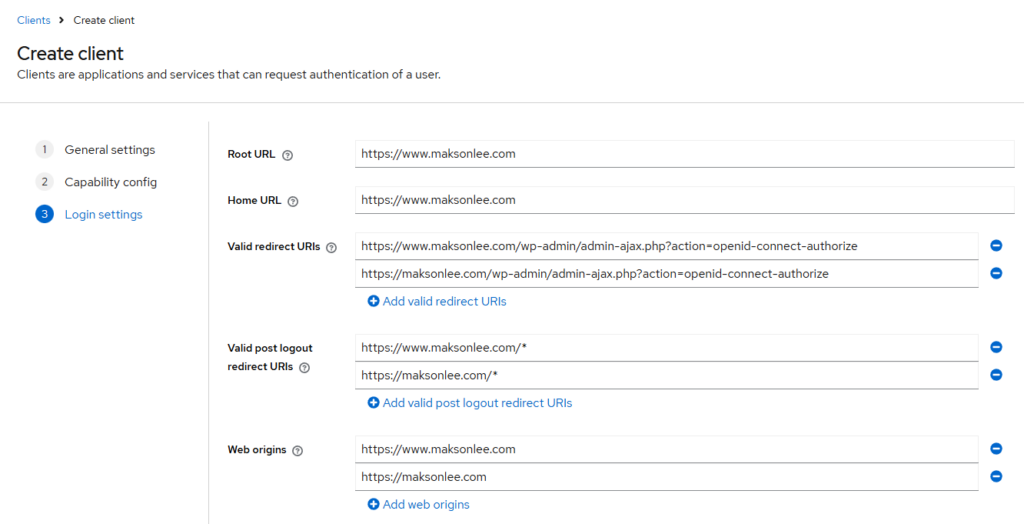
- Root URL
https://www.maksonlee.com
- Home URL
https://www.maksonlee.com
- Valid redirect URIs
https://www.maksonlee.com/wp-admin/admin-ajax.php?action=openid-connect-authorizehttps://maksonlee.com/wp-admin/admin-ajax.php?action=openid-connect-authorize
- Valid post logout redirect URIs
https://www.maksonlee.com/*https://maksonlee.com/*
- Web origins
https://www.maksonlee.comhttps://maksonlee.com
Click Save.
- Copy the Client Secret from Keycloak
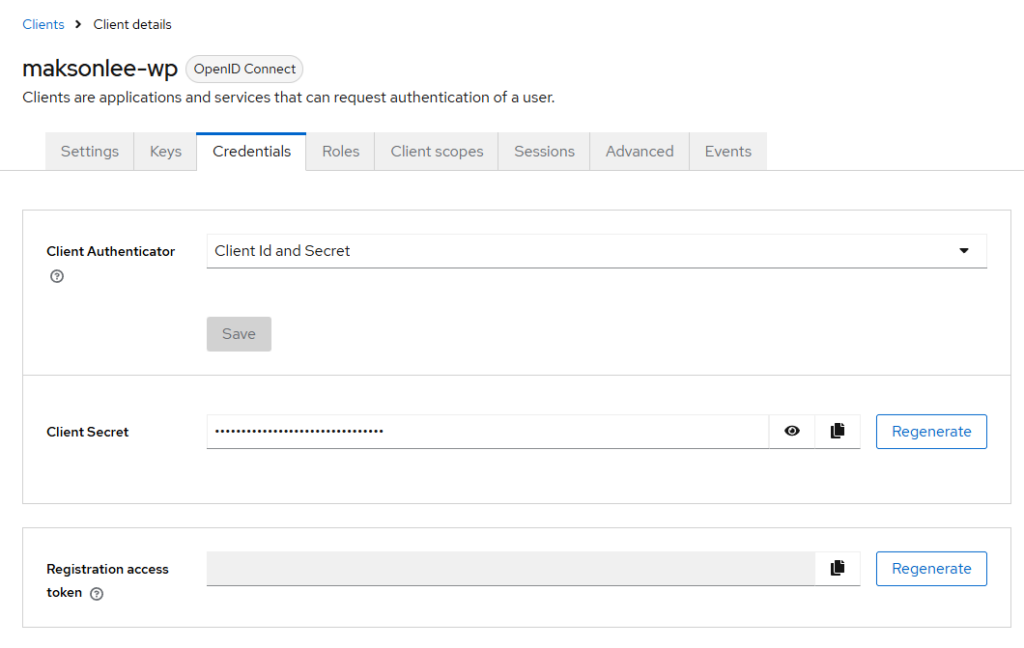
Keycloak → Clients → maksonlee-wp → Credentials
- Client Authenticator: Client Id and Secret
- Reveal Client Secret (eye icon) and copy it
- Install the WordPress plugin
WordPress Admin → Plugins → Add New
Search:
- OpenID Connect Generic Client (by Jonathan Daggerhart)
Install and Activate.
- Configure WordPress OIDC (Keycloak endpoints + mapping)
WordPress Admin → Settings → OpenID Connect Client
Core settings
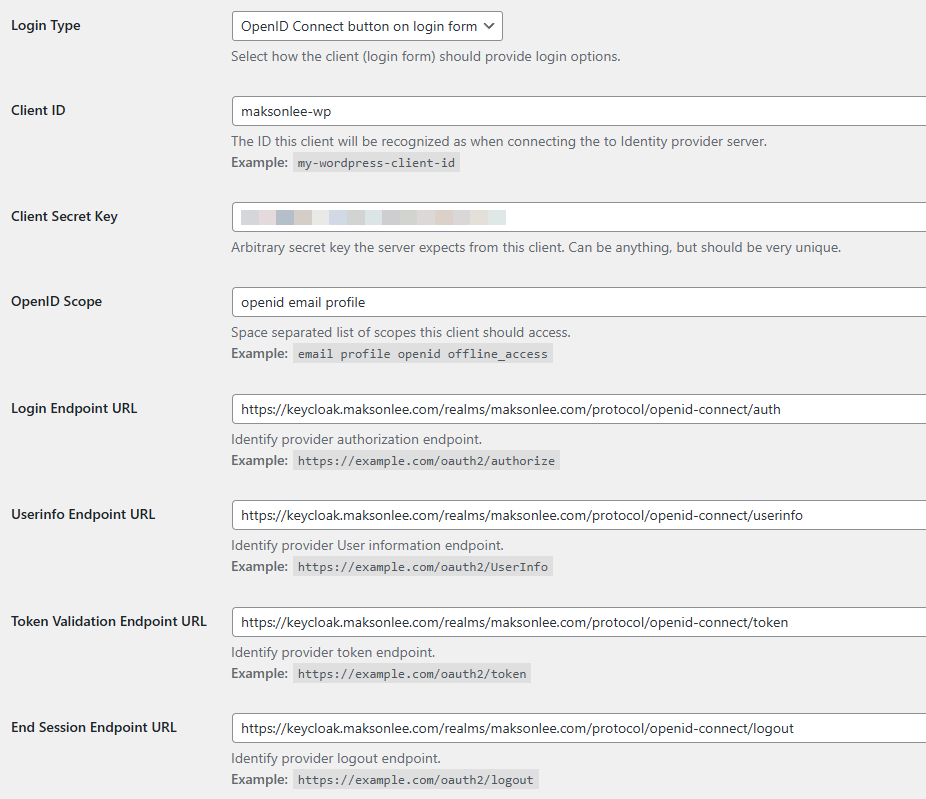
- Login Type
- OpenID Connect button on login form
- Client ID
- maksonlee-wp
- Client Secret Key
- Paste the Keycloak Client Secret
- OpenID Scope
- openid email profile
- Keycloak endpoints (copy/paste)
- Login Endpoint URL
https://keycloak.maksonlee.com/realms/maksonlee.com/protocol/openid-connect/auth
- Userinfo Endpoint URL
https://keycloak.maksonlee.com/realms/maksonlee.com/protocol/openid-connect/userinfo
- Token Validation Endpoint URL
https://keycloak.maksonlee.com/realms/maksonlee.com/protocol/openid-connect/token
- End Session Endpoint URL
https://keycloak.maksonlee.com/realms/maksonlee.com/protocol/openid-connect/logout
- Login Endpoint URL
WordPress User Settings
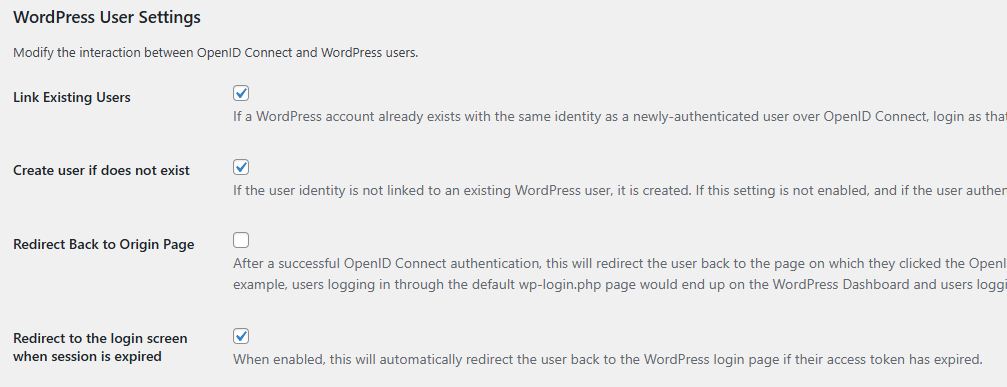
- ✅ Link Existing Users
- ✅ Create user if does not exist
- ✅ Redirect to the login screen when session is expired
Pitfall: If a WordPress user already exists but the Keycloak account has a different email, the plugin may create a second WordPress user on first login (when Link Existing Users + Create user if does not exist are enabled). Make sure the email matches.
Claim keys
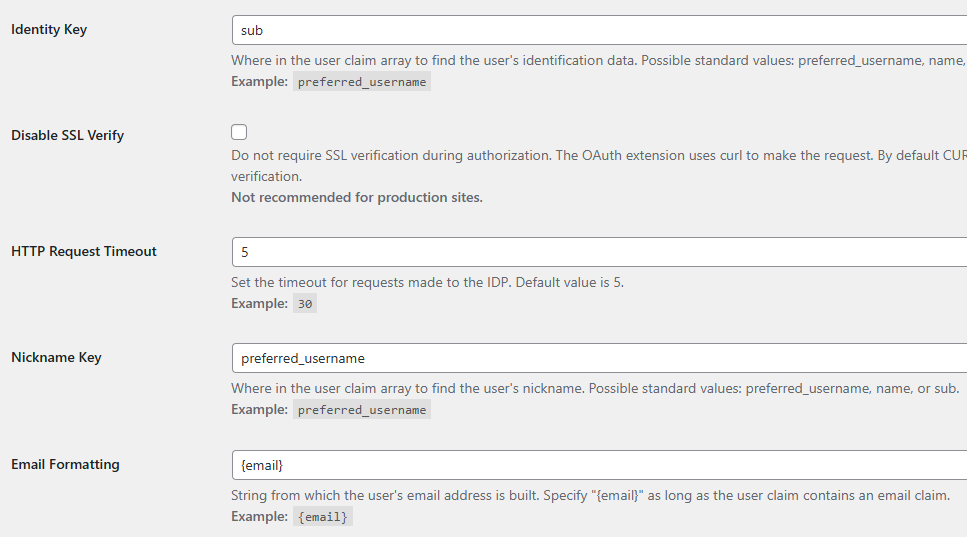
- Identity Key
- sub
- Nickname Key
- preferred_username
- Email Formatting
- {email}
Leave Disable SSL Verify unchecked.
Click Save Changes.
- Test login
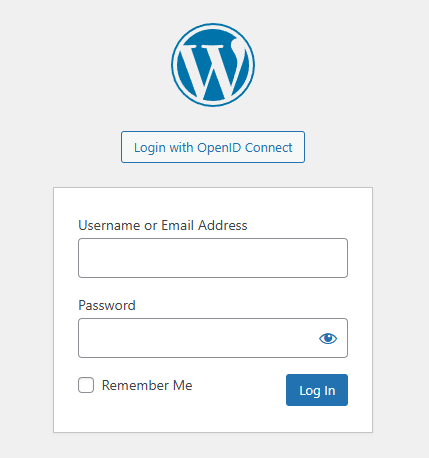
- Open an incognito window
- Go to:
https://www.maksonlee.com/wp-login.php
- Click Login with OpenID Connect
- You should be redirected to Keycloak, then back to WordPress as a logged-in user
Did this guide save you time?
Support this site