In my previous posts,
This post is the next step: take that external Ceph cluster and hook it directly into Proxmox so you can place Proxmox VM/CT disks on Ceph RBD.
We will:
- Create a dedicated RBD pool for Proxmox.
- Create a CephX client user with access only to that pool.
- Add that pool as RBD storage in Proxmox VE 9 (web UI only).
- Create a test VM whose disk lives on Ceph RBD.
No extra packages are needed on Proxmox; all configuration is done in the web interface.
Lab Overview
My current lab:
- KVM host (physical)
- OS: Ubuntu 24.04
- Hypervisor: KVM/libvirt + Cockpit
- Bridge:
br0 - Host IP:
192.168.0.84/24
- Proxmox VM (nested)
- OS: Proxmox VE 9
- Hostname:
pve - IP:
192.168.0.11/24 - Installed from
proxmox-ve_9.0-1.iso
- Ceph node
- OS: Ubuntu 24.04
- Ceph: Squid v19 via
cephadm - Hostname:
ceph.maksonlee.com - IP:
192.168.0.81/24
- Existing Proxmox storages
local(Directory): backups, ISOs, container templateslocal-lvm(LVM-Thin): VM/CT disks on the Proxmox VM’s virt diskcephfs-pve(CephFS): shared backup/import/ISO/snippets storage
Goal:
Add an RBD pool named proxmox on the Ceph node, and a Proxmox storage named ceph-rbd that points to that pool and is used for VM/CT disks.
RBD in Proxmox is only for disks (VM and container). ISO images, templates, and backups should stay on directory/NFS/CephFS storage.
- Create the
proxmoxRBD Pool (Ceph Node)
SSH into the Ceph node as administrator:
ssh administrator@ceph.maksonlee.comCreate a new pool named proxmox:
sudo cephadm shell -- \
ceph osd pool create proxmox 8Example output:
pool 'proxmox' createdEnable the RBD application on that pool:
sudo cephadm shell -- \
ceph osd pool application enable proxmox rbdExample:
enabled application 'rbd' on pool 'proxmox'Initialize the pool for RBD:
sudo cephadm shell -- \
rbd pool init proxmoxThat’s enough to make proxmox a valid RBD pool for our VM disks.
- Create a CephX User for Proxmox
Still on the Ceph node, create a dedicated client user that Proxmox will use to access the pool:
sudo cephadm shell -- \
  ceph auth get-or-create client.proxmox \
    mon 'allow r' \
osd 'allow rwx pool=proxmox'Example output:
[client.proxmox]
key = AQDsgBppwICuFxAA/EwZ13V0DTNExrq18alqJQ==Now display the full auth record:
sudo cephadm shell -- \
ceph auth get client.proxmoxYou should see something like:
[client.proxmox]
        key = AQDsgBppwICuFxAA/EwZ13V0DTNExrq18alqJQ==
caps mon = "allow r"
caps osd = "allow rwx pool=proxmox"Copy this entire block; we’ll paste it into Proxmox in the next step.
- Add Ceph RBD Storage in Proxmox (Web UI)
Open the Proxmox web interface:
https://192.168.0.11:8006/
Log in as root (Realm: Linux PAM standard authentication).
- View existing storages
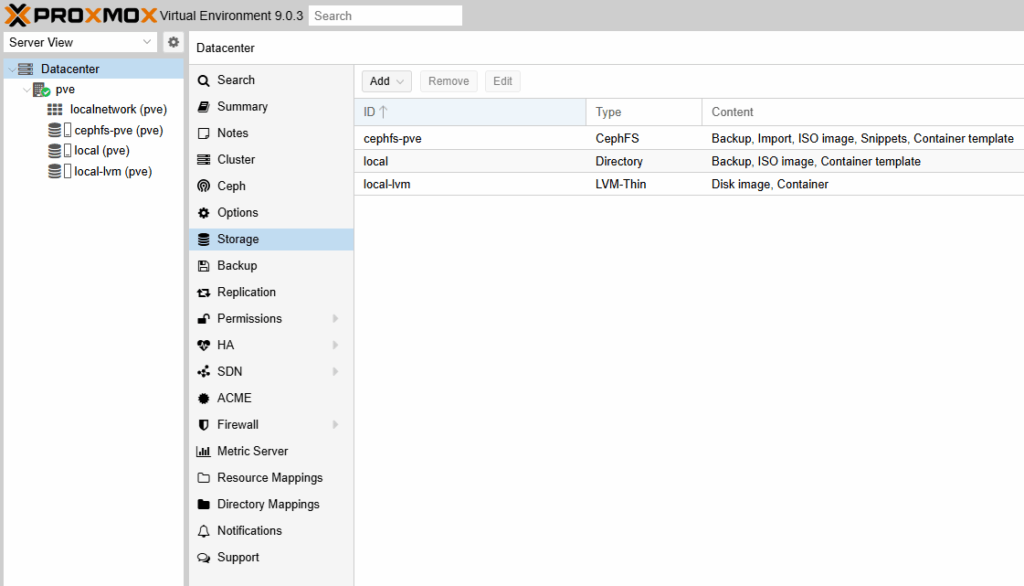
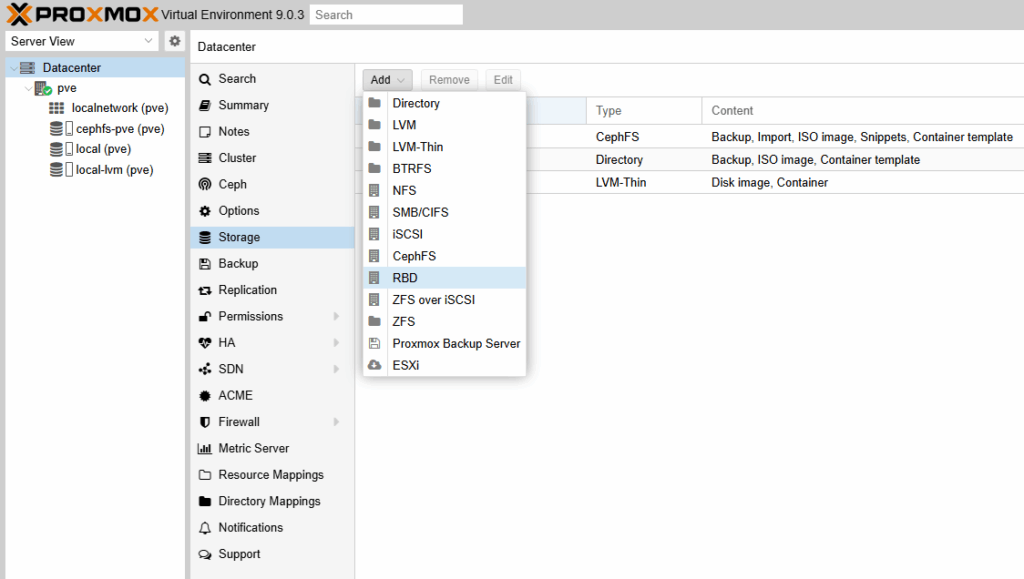
- Open “Add RBD”
- Fill in the RBD fields
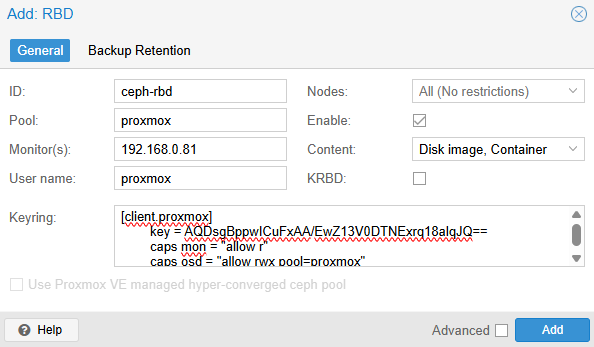
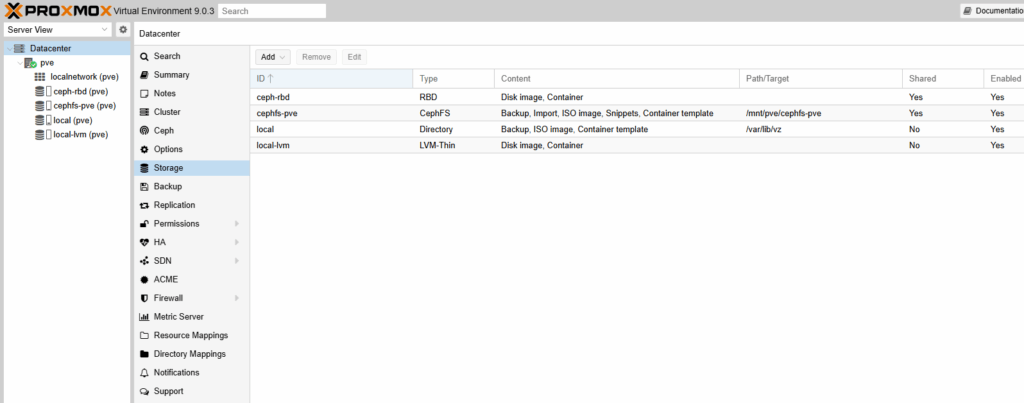
- Verify that
ceph-rbdis active
From the Proxmox shell you can also run:
pvesm statusName Type Status Total Used Available %
ceph-rbd rbd active 56565192 0 56565192 0.00%
cephfs-pve cephfs active 59699200 3137536 56561664 5.26%
local dir active 25654272 3478332 20847404 13.56%
local-lvm lvmthin active 18575360 0 18575360 0.00%The important part is that ceph-rbd is active and shows the correct size and free space from the Ceph pool.
- Create a Test VM with Disk on Ceph RBD
Now we’ll confirm the integration by creating a VM whose disk lives on ceph-rbd.
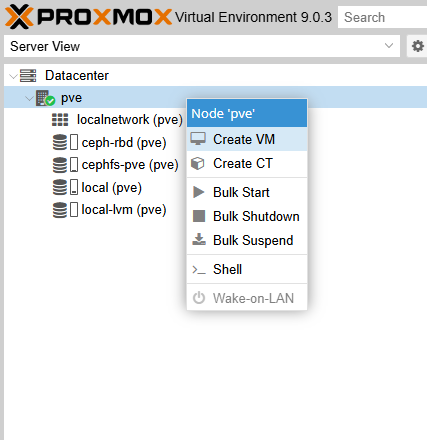
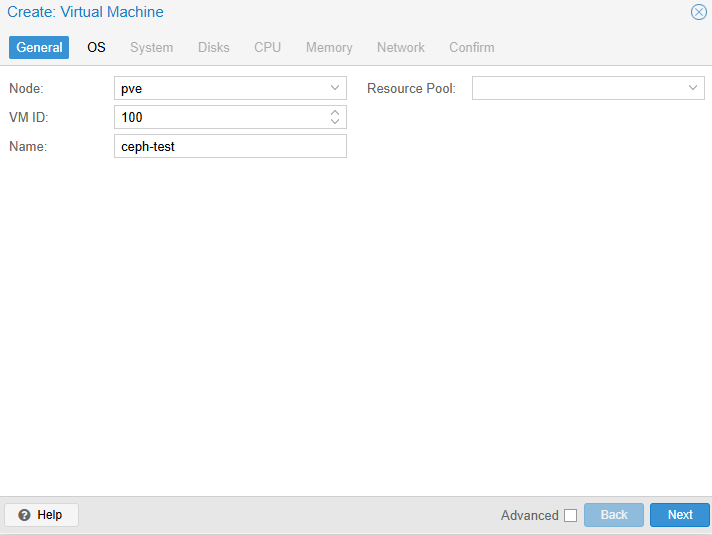
- Start the VM creation wizard
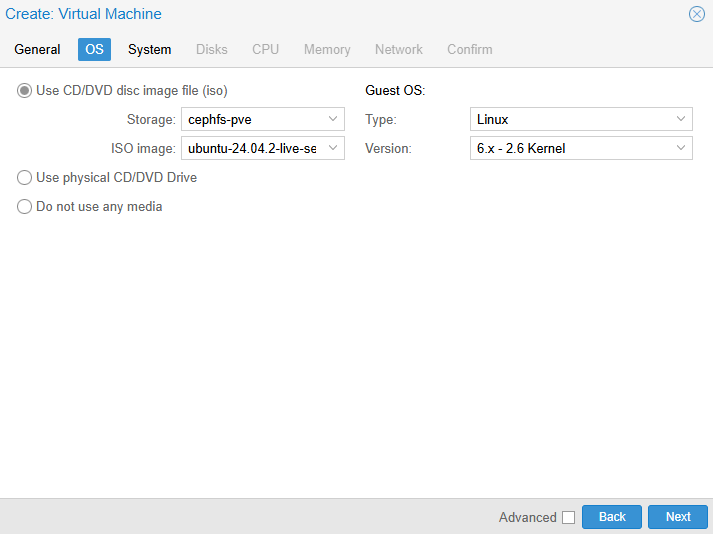
- OS tab – boot ISO from CephFS
- System tab – leave defaults

- Disks tab – place disk on
ceph-rbd

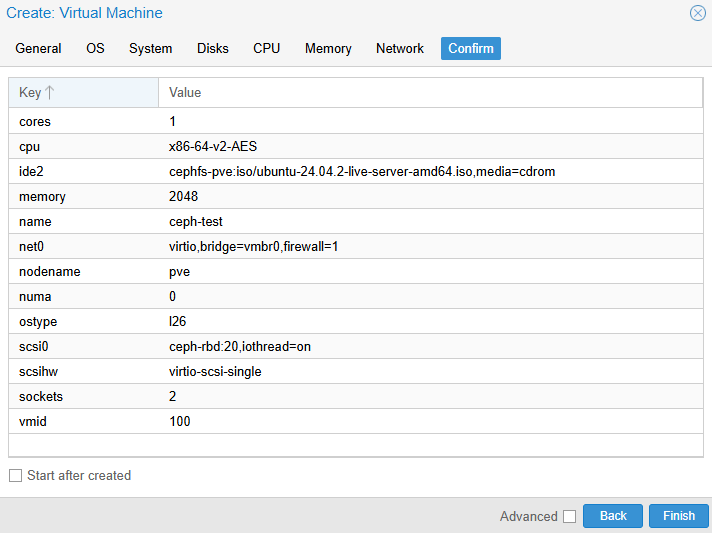
- Confirm and create
- Boot the VM and start the installer


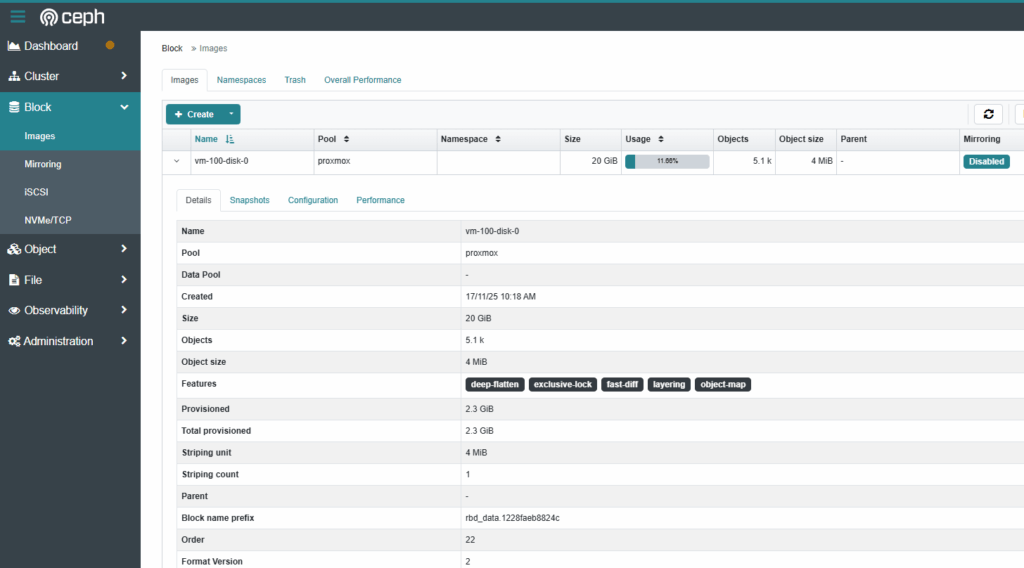
- Verify the RBD image on the Ceph node
sudo cephadm shell -- rbd ls proxmoxvm-100-disk-0- Verify in the Ceph Dashboard
Did this guide save you time?
Support this site